Description
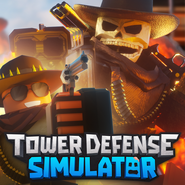
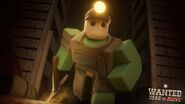
Badlands II is a day-time map set in a western desert town. It is the new version of the original Badlands. The mode of the map is always set to Fallen. It is a special map, meaning that you can only access it through the Gunslinger statue. Because of this, you need to be Level 25 or higher to play this map.
Badlands II has the HP Locked, Enemies Beta, Badlands, Mutation, All Paths and Cowboy modifiers that are intended to make the game harder or change the appearance of enemies. The Badlands modifier changes some enemies into their stronger, western variants, that can also increase their health by 5% with each wave due to the Mutation modifier. The All Paths makes it so enemies are duplicated for each path, instead of alternating between points. As this map has three paths, the amount of enemies is tripled, with a few exceptions, such as the Gunslinger and Cavalry. The base health is also set to 200, regardless of the players' levels, due to the HP Locked modifier. Additionally, any enemies that were not replaced by the Badlands modifier may have a different appearance than they would usually have due to the Enemies Beta modifier, while most enemies, with the exception of the Husk, Undead Miner, Cavalry and Gunslinger will get a cowboy hat due to the Cowboy modifier. The Enemies Beta modifier also replaces some enemies and changes their statistics. Multiple of these modifiers also increase all currency rewards, increasing the currency rewards by 70%
Triumphing this map will grant you the Cowboy tower, which can be bought in the store for ![]() 4,000 or through the Gift Box menu. Triumphing this map in under 18 minutes will also grant you the Badlands skin for the Cowboy, that can also be redeemed in the Gift Box menu.
4,000 or through the Gift Box menu. Triumphing this map in under 18 minutes will also grant you the Badlands skin for the Cowboy, that can also be redeemed in the Gift Box menu.
Design & Path
The map takes place in a Western-themed town. The terrain of this island is mainly sand, with plenty of western-themed buildings, on which you can place cliff towers. Two rail tracks can be found on the ground, with a train on one of them. Multiple entrances to cave mines can be found, with minecart rail tracks leading to them. There is also a destroyed rail track above the city.
This map has three paths, all of them starting at yellow portals and end at cave mine players have to defend. The left path ends at the right cave, the middle path ends at the middle cave and the right path ends at the left cave. The middle path is a straight line, while the other two paths take multiple turns.
Interactive Map
Rewards
The game calculates how many ![]() Coins and
Coins and ![]() EXP you receive based on how many waves you survived and if you won a match. During periods of 100% more
EXP you receive based on how many waves you survived and if you won a match. During periods of 100% more ![]() EXP (Friday – Sunday), any
EXP (Friday – Sunday), any ![]() EXP earned is multiplied by 2x through the XP Boost modifier. The VIP gamepass also multiplies any
EXP earned is multiplied by 2x through the XP Boost modifier. The VIP gamepass also multiplies any ![]() EXP earned by 1.25x through the VIP Boost modifier. These two boosts are additive. Regular
EXP earned by 1.25x through the VIP Boost modifier. These two boosts are additive. Regular ![]() EXP boosts are multiplicative with other modifiers present on this map.
EXP boosts are multiplicative with other modifiers present on this map.
Any rewards that end in a decimal point is rounded down, no matter the first figure of the leading decimal.
Currently, rewards are calculated as:
| Coins Reward | EXP Reward |
|---|---|
| ( |
Waves 1-9: Waves Completed × Waves 10-40: Waves Completed × |
For a few hours on the 27th of May 2024, rewards were calculated as:
| Coins Reward | EXP Reward |
|---|---|
| ( |
Waves Completed × |
Before 27th of May 2024, rewards were calculated as:
| Coins Reward | EXP Reward |
|---|---|
| ( |
Waves Completed × |
Prior to the 23rd of May 2024, rewards were calculated as:
| Coins Reward | EXP Reward |
|---|---|
| ( |
Waves 1-9: Waves Completed × Waves 10-40: (Waves Completed × |
Before the 31st of October 2022, rewards were calculated as:
| Coins Reward | EXP Reward |
|---|---|
| ( |
Waves 1-9: Waves Completed × Waves 10-40: (Waves Completed × |
Badges
There are also two badges which you can obtain when playing this map, which have additional rewards alongside the badge. They are:
| Defeated Gunslinger! ✔ OBTAINABLE | |
|---|---|

|
This town ain't big enough for the two of us... Triumph the Badlands and unlock the "Cowboy" tower!
Rewards: |
| Quickdraw! ✔ OBTAINABLE | |
|---|---|

|
Well he didn't see that one coming.. Unlocks a secret reward!
Rewards: |
Wave Structure
The wave structure is similar to Fallen mode's but there are some changes. Most notably, all enemies spawn thrice on this map, with the exception of the Gunslinger, which only spawns once on the middle path and the Cavalry, which spawns three times on the left and right paths, instead of four times on all paths. Some enemies are also replaced by stronger variants, due to the Badlands and Enemies Beta modifiers.
- The Breaker2 replaces the Mystery.
- The Necromancer replaces the Dark Necromancer.
- The Necromancer also spawns Skeletons with its Summon ability.
- The Husk replaces the Fallen.
- The Breaker4 replaces the Mystery Boss.
- The Warden replaces the Templar.
- The Necromancer Boss replaces the Summoner Boss.
- The Necromancer Boss also spawns Cursed Skeletons with its Cursed Summon ability.
- The Undead Miner replaces the Fallen Hero.
- The Cavalry replaces the Fallen Guardian.
- The Gunslinger replaces the Fallen King.
Badlands II has the same wave bonus cash and same skip times as Fallen mode. This means that the formula for calculating wave bonus on each wave is:
- (
 $183.5 - ((Players - 1) * 20.5)) + Waves Completed × (
 $45 - ((Players - 1) * 5))
The wave clear bonus appears when every enemy from that wave was killed. It is 35% of the wave bonus in solo, while for duo, trio and quad it is 20%.
Before 23rd of May 2024, the formula for calculating wave bonus on each wave was:
- (
 $180 + (
 $50 × Waves Completed)) ÷ Players
The waves in Badlands II follow these timings:
| Waves | Wave Timer | Skip Time[1] |
|---|---|---|
| 1-29 | 1:00 | 0:19[2] |
| 30-38 | 1:20 | 0:19[3] |
| 39 | 2:00 | 0:19[4] |
| 40 | ∞ | N/A |
Bolded names indicates an enemy type's debut. Prior to the 31st of October 2022, Fallen mode dialogue used to play. However, this is no longer the case.
| Wave | Path | Enemy Type & Amount |
|---|---|---|
| 1 | Left | 5x Abnormal |
| Middle | 5x Abnormal | |
| Right | 5x Abnormal | |
| 2 | Left | 6x Abnormal |
| Middle | 6x Abnormal | |
| Right | 6x Abnormal | |
| 3 | Left | 7x Abnormal |
| Middle | 7x Abnormal | |
| Right | 7x Abnormal | |
| 4 | Left | 8x Abnormal |
| Middle | 8x Abnormal | |
| Right | 8x Abnormal | |
| 5 | Left | 8x Quick |
| Middle | 8x Quick | |
| Right | 8x Quick | |
| 6 | Left | 5x Abnormal, 8x Quick |
| Middle | 5x Abnormal, 8x Quick | |
| Right | 5x Abnormal, 8x Quick | |
| 7 | Left | 10x Heavy |
| Middle | 10x Heavy | |
| Right | 10x Heavy | |
| 8 | Left | 5x Quick, 6x Abnormal, 6x Heavy |
| Middle | 5x Quick, 6x Abnormal, 6x Heavy | |
| Right | 5x Quick, 6x Abnormal, 6x Heavy | |
| 9 | Left | 8x Heavy, 5x Abnormal, 7x Quick |
| Middle | 8x Heavy, 5x Abnormal, 7x Quick | |
| Right | 8x Heavy, 5x Abnormal, 7x Quick | |
| 10 | Left | 12x Abnormal, 4x Heavy, 1x Abnormal Boss |
| Middle | 12x Abnormal, 4x Heavy, 1x Abnormal Boss | |
| Right | 12x Abnormal, 4x Heavy, 1x Abnormal Boss | |
| 11 | Left | 8x Heavy, 8x Abnormal, 8x Quick |
| Middle | 8x Heavy, 8x Abnormal, 8x Quick | |
| Right | 8x Heavy, 8x Abnormal, 8x Quick | |
| 12 | Left | 1x Abnormal Boss, 8x Abnormal |
| Middle | 1x Abnormal Boss, 8x Abnormal | |
| Right | 1x Abnormal Boss, 8x Abnormal | |
| 13 | Left | 10x Shadow |
| Middle | 10x Shadow | |
| Right | 10x Shadow | |
| 14 | Left | 12x Heavy, 2x Abnormal Boss |
| Middle | 12x Heavy, 2x Abnormal Boss | |
| Right | 12x Heavy, 2x Abnormal Boss | |
| 15 | Left | 20x Shadow |
| Middle | 20x Shadow | |
| Right | 20x Shadow | |
| 16 | Left | 8x Breaker2 |
| Middle | 8x Breaker2 | |
| Right | 8x Breaker2 | |
| 17 | Left | 6x Heavy, 6x Breaker2 |
| Middle | 6x Heavy, 6x Breaker2 | |
| Right | 6x Heavy, 6x Breaker2 | |
| 18 | Left | 14x Breaker2 |
| Middle | 14x Breaker2 | |
| Right | 14x Breaker2 | |
| 19 | Left | 4x Heavy, 6x Quick, 4x Shadow, 3x Breaker2, 2x Abnormal Boss, 1x Necromancer |
| Middle | 4x Heavy, 6x Quick, 4x Shadow, 3x Breaker2, 2x Abnormal Boss, 1x Necromancer | |
| Right | 4x Heavy, 6x Quick, 4x Shadow, 3x Breaker2, 2x Abnormal Boss, 1x Necromancer | |
| 20 | Left | 4x Husk, 1x Abnormal Boss |
| Middle | 4x Husk, 1x Abnormal Boss | |
| Right | 4x Husk, 1x Abnormal Boss | |
| 21 | Left | 5x Husk, 2x Abnormal Boss, 8x Heavy, 4x Shadow, 7x Breaker2 |
| Middle | 5x Husk, 2x Abnormal Boss, 8x Heavy, 4x Shadow, 7x Breaker2 | |
| Right | 5x Husk, 2x Abnormal Boss, 8x Heavy, 4x Shadow, 7x Breaker2 | |
| 22 | Left | 8x Heavy, 4x Shadow, 8x Breaker2, 2x Abnormal Boss, 1x Giant Boss |
| Middle | 8x Heavy, 4x Shadow, 8x Breaker2, 2x Abnormal Boss, 1x Giant Boss | |
| Right | 8x Heavy, 4x Shadow, 8x Breaker2, 2x Abnormal Boss, 1x Giant Boss | |
| 23 | Left | 6x Husk, 1x Giant Boss, 8x Breaker2, 1x Necromancer |
| Middle | 6x Husk, 1x Giant Boss, 8x Breaker2, 1x Necromancer | |
| Right | 6x Husk, 1x Giant Boss, 8x Breaker2, 1x Necromancer | |
| 24 | Left | 6x Husk, 8x Breaker2, 1x Shadow Boss |
| Middle | 6x Husk, 8x Breaker2, 1x Shadow Boss | |
| Right | 6x Husk, 8x Breaker2, 1x Shadow Boss | |
| 25 | Left | 12x Husk, 4x Heavy, 6x Breaker2, 4x Necromancer |
| Middle | 12x Husk, 4x Heavy, 6x Breaker2, 4x Necromancer | |
| Right | 12x Husk, 4x Heavy, 6x Breaker2, 4x Necromancer | |
| 26 | Left | 12x Glitch |
| Middle | 12x Glitch | |
| Right | 12x Glitch | |
| 27 | Left | 10x Glitch, 8x Husk, 8x Breaker2, 4x Abnormal Boss |
| Middle | 10x Glitch, 8x Husk, 8x Breaker2, 4x Abnormal Boss | |
| Right | 10x Glitch, 8x Husk, 8x Breaker2, 4x Abnormal Boss | |
| 28 | Left | 13x Hazard, 2x Giant Boss, 10x Breaker2, 10x Glitch |
| Middle | 13x Hazard, 2x Giant Boss, 10x Breaker2, 10x Glitch | |
| Right | 13x Hazard, 2x Giant Boss, 10x Breaker2, 10x Glitch | |
| 29 | Left | 1x Giant Boss, 10x Breaker2, 12x Glitch, 12x Husk, 4x Hazard |
| Middle | 1x Giant Boss, 10x Breaker2, 12x Glitch, 12x Husk, 4x Hazard | |
| Right | 1x Giant Boss, 10x Breaker2, 12x Glitch, 12x Husk, 4x Hazard | |
| 30 | Left | 5x Husk, 4x Hazard, 4x Abnormal Boss, 2x Shadow Boss, 20x Breaker2, 9x Glitch, 1x Tank |
| Middle | 5x Husk, 4x Hazard, 4x Abnormal Boss, 2x Shadow Boss, 20x Breaker2, 9x Glitch, 1x Tank | |
| Right | 5x Husk, 4x Hazard, 4x Abnormal Boss, 2x Shadow Boss, 20x Breaker2, 9x Glitch, 1x Tank | |
| 31 | Left | 5x Giant Boss, 13x Hazard, 10x Husk, 1x Necromancer |
| Middle | 5x Giant Boss, 13x Hazard, 10x Husk, 1x Necromancer | |
| Right | 5x Giant Boss, 13x Hazard, 10x Husk, 1x Necromancer | |
| 32 | Left | 3x Giant Boss, 8x Breaker2, 1x Tank, 10x Breaker4 |
| Middle | 3x Giant Boss, 8x Breaker2, 1x Tank, 10x Breaker4 | |
| Right | 3x Giant Boss, 8x Breaker2, 1x Tank, 10x Breaker4 | |
| 33 | Left | 6x Giant Boss, 24x Glitch, 10x Breaker2, 12x Breaker4, 1x Necromancer, 3x Shadow Boss |
| Middle | 6x Giant Boss, 24x Glitch, 10x Breaker2, 12x Breaker4, 1x Necromancer, 3x Shadow Boss | |
| Right | 6x Giant Boss, 24x Glitch, 10x Breaker2, 12x Breaker4, 1x Necromancer, 3x Shadow Boss | |
| 34 | Left | 8x Giant Boss, 1x Boomer, 8x Glitch, 6x Breaker2, 6x Hazard, 8x Husk, 14x Breaker4 |
| Middle | 8x Giant Boss, 1x Boomer, 8x Glitch, 6x Breaker2, 6x Hazard, 8x Husk, 14x Breaker4 | |
| Right | 8x Giant Boss, 1x Boomer, 8x Glitch, 6x Breaker2, 6x Hazard, 8x Husk, 14x Breaker4 | |
| 35 | Left | 1x Warden, 5x Hazard, 20x Breaker4 |
| Middle | 1x Warden, 5x Hazard, 20x Breaker4 | |
| Right | 1x Warden, 5x Hazard, 20x Breaker4 | |
| 36 | Left | 8x Giant Boss, 1x Boomer, 8x Glitch, 1x Tank, 8x Error, 1x Necromancer Boss |
| Middle | 8x Giant Boss, 1x Boomer, 8x Glitch, 1x Tank, 8x Error, 1x Necromancer Boss | |
| Right | 8x Giant Boss, 1x Boomer, 8x Glitch, 1x Tank, 8x Error, 1x Necromancer Boss | |
| 37 | Left | 1x Boomer, 10x Glitch, 18x Error, 6x Giant Boss, 2x Shadow Boss, 6x Hazard, 6x Husk, 1x Warden, 2x Necromancer Boss |
| Middle | 1x Boomer, 10x Glitch, 18x Error, 6x Giant Boss, 2x Shadow Boss, 6x Hazard, 6x Husk, 1x Warden, 2x Necromancer Boss | |
| Right | 1x Boomer, 10x Glitch, 18x Error, 6x Giant Boss, 2x Shadow Boss, 6x Hazard, 6x Husk, 1x Warden, 2x Necromancer Boss | |
| 38 | Left | 16x Giant Boss, 18x Error, 1x Warden, 10x Hazard, 15x Breaker4, 1x Tank |
| Middle | 16x Giant Boss, 18x Error, 1x Warden, 10x Hazard, 15x Breaker4, 1x Tank | |
| Right | 16x Giant Boss, 18x Error, 1x Warden, 10x Hazard, 15x Breaker4, 1x Tank | |
| 39 | Left | 2x Boomer, 2x Tank, 26x Error, 10x Glitch, 1x Warden, 10x Hazard, 20x Husk, 7x Undead Miner, 1x Necromancer Boss |
| Middle | 2x Boomer, 2x Tank, 26x Error, 10x Glitch, 1x Warden, 10x Hazard, 20x Husk, 7x Undead Miner, 1x Necromancer Boss | |
| Right | 2x Boomer, 2x Tank, 26x Error, 10x Glitch, 1x Warden, 10x Hazard, 20x Husk, 7x Undead Miner, 1x Necromancer Boss | |
| 40 | Left | 5x Undead Miner, 1x Warden, 6x Glitch, 16x Error, 10x Husk, 9x Giant Boss, 3x Cavalry, 7x Breaker4 |
| Middle | 5x Undead Miner, 1x Warden, 6x Glitch, 16x Error, 10x Husk, 9x Giant Boss, 1x Gunslinger, 7x Breaker4 | |
| Right | 5x Undead Miner, 1x Warden, 6x Glitch, 16x Error, 10x Husk, 9x Giant Boss, 3x Cavalry, 7x Breaker4 | |
| Lose Dialogue | ||
| One icon and dialogue is randomly chosen upon defeat:
•We're toast! | ||
Strategy
- It is recommended to place your towers near the middle section of the map, as it covers most of the map's path.
- Early on, if you are not trying to get the Quickdraw! badge, you can place tower near the point where all the paths intersect to handle all the paths easily, even though they may not cover much of the map.
- As many enemies spawn in this map that with waves get increased health or get replaced with stronger variants, high DPS towers like Accelerator, Engineer or Golden Minigunner are recommended for late game.
- They are also recommended as the Gunslinger travels quite fast and requires high DPS towers in order to defeat it before it reaches the exit.
- Because of how many enemies spawn here, crowd control towers like the Golden Pyromancer and Mortar are required.
- Slowing towers like the Sledger or Electroshocker may also be useful at slowing down enemies.
- Support towers, such as the Commander, DJ Booth and Medic are necessary due to how dangerous the waves can get.
- The Cowboy and Golden Cowboy can be quite useful at making money here, due to enemies spawning thrice and them gaining health with the Mutation modifier.
- If you want the Quickdraw! badge, it is recommended to have a good strategy, since it is only obtained by beating this map in less than 18 minutes, which is quite a challenge.
- Teamwork is essential for this badge. Playing with random players is unlikely to make you get it.
- If you are trying to get the Quickdraw! badge, early on you should place down cheap towers that can quickly kill the enemies, such as the Golden Scout or Gladiator, near all the entrances.
- If you have it, you may use the Nuke to clear out the enemies on wave 40 so that your towers can focus on the Gunslinger.
Gallery
Thumbnails
Icons
Promotional Images
Promotional Videos
Trailers
Badges
Trivia
- This is the second survival map in the game that does not let you choose the gamemode you play on, with the first being Polluted Wasteland II.
- This is the second map to have three paths, with the first being Totality Tower.
- It is also the first survival map to have three paths.
- This is the map with the highest number of modifiers, at six, only being followed by Pizza Party with five modifiers.
- At the beginning of Waves 1, 10, 20, 30 and 40, a random Intro soundtrack is chosen to play, after which the ambience or final wave music will play.
- As there are only three intros and five waves they play on, some Intro soundtracks will play multiple times.
- Badlands II has the highest number of soundtracks used for a map, having five soundtracks that it can play, with these being three intros, one ambience and one final wave music.
Update History
- 30 September 2022
- Badlands II added, Directly replacing the Badlands Map.
- Bug: Badlands II matches may sometimes have more than 4 players, if you start a match using Matchmaking.
- 31 October 2022
- Commander dialogue removed.
- 10 May 2024
- Bug: Badlands II not working correctly.
- 11 May 2024
- Bugfix: Badlands II now works correctly.
- 23 May 2024
- Updated to the new challenge map system.
- Removed
 EXP triumph bonus.
 - Bug: Modifiers are applied twice.
- Bug: No longer gives any badges upon triumphing.
- Bug: No longer unlocks the ability to purchase the Cowboy upon triumphing.
- Bug: Commander's dialogue for Fallen Mode now appears.
- 27 May 2024
- Bugfix: Badges are now obtainable.
- Bugfix: Cowboy is now unlockable.
- Later the same day:
- Bugfix: Modifiers no longer apply twice.
Notes


