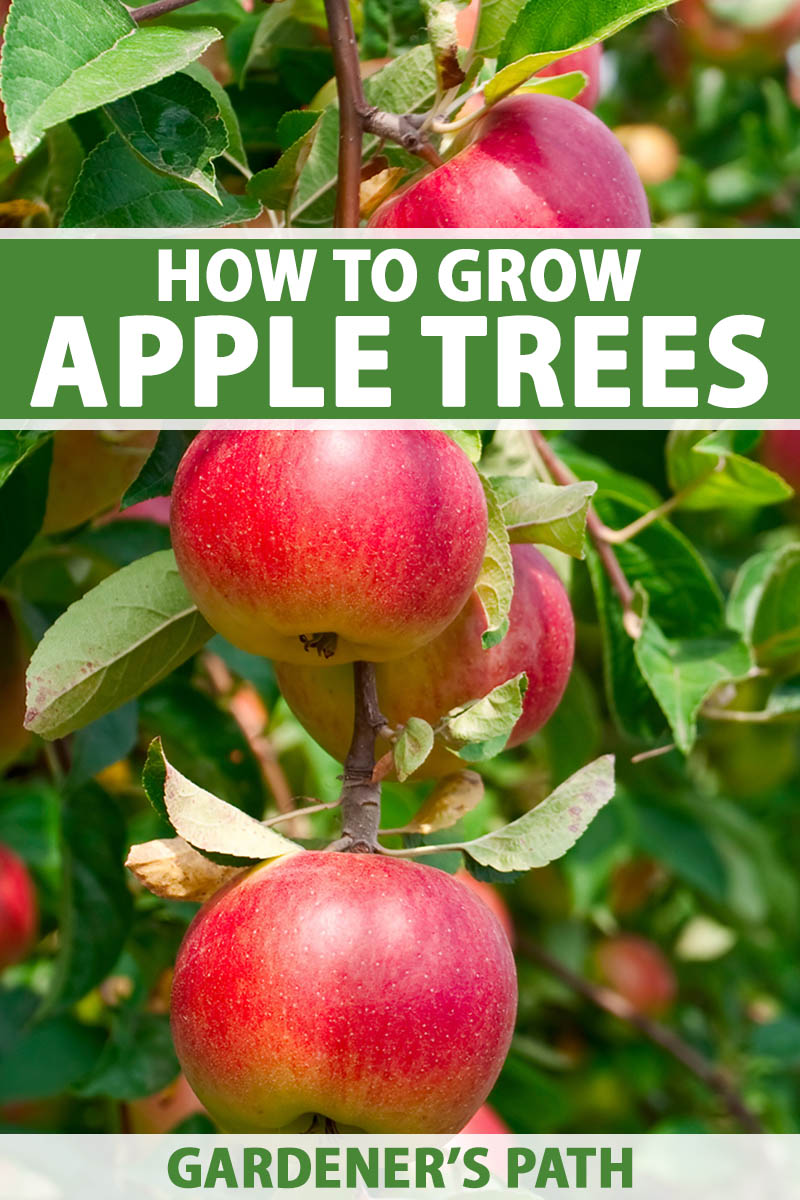
Malus x domestica
When somebody says, “Imagine a tree,” what do you picture? Many of us envision an apple tree, with its characteristic shape and coloring.
And if we’re asked to think of a fruit, many of our minds immediately jump to apples. After all, they’re one of the most popular fruits in the US – behind bananas, strawberries, and grapes.
I’ll admit, years ago apples weren’t even in my top ten favorite fruits. I have had several trees throughout my life and while I enjoyed them as ornamentals, I mostly gave away the fruits to my friends and my horse.
We link to vendors to help you find relevant products. If you buy from one of our links, we may earn a commission.
But they slowly won me over, so much so that when I bought a new house with a half dozen existing apple trees, instead of tearing them out and planting the quince and persimmons I wanted, I nurtured them.
And you know what? Now, not only do I adore apple trees for the spring flowers and the summer shade, but I find myself craving a fresh apple off the tree in the fall.
Whether you’re a convert like me or just starting out on your apple journey, this guide has you covered. Here’s what’s in the lineup:
What You’ll Learn
Cultivation and History
Apples have been with us for a long, long time. Humans have been eating apples and using them for medicine long before record-keeping began.
Before humans started cultivating the trees, wildlife and livestock ate the fruits and transported the seeds far and wide.
Apples originated in central Asia and the plants we grow today look nothing like those our ancestors came across thousands and thousands of years ago.
The wild ancestors of the apple trees cultivated today include the wild Asian species Malus sieversii, and it still grows in the area. Our modern apple, meanwhile, is classified as M. x domestica.
To be precise, genetic research shows that modern apples are actually a hybrid of at least four different species that were brought together as the seeds, fruits, and trees were carried by wildlife and humans from Asia to Europe and other parts of the world.
In addition to that, modern apples actually have more crabapple DNA than DNA from wild apples.
Notably, the European crabapple M. sylvestris is a major contributor to the genetics of the apples we enjoy today. Eastern crabapple (M. orientalis) and Siberian crabapple (M. baccata) also contributed to our modern apple, to a lesser degree.
The ancestors of the modern M. x domestica have been cultivated for at least 8,000 years.
Ancient Egyptians, Greeks, and Romans cultivated apple trees, and Roman invaders brought them to Britain in around 200BC.
The trees also spread throughout Europe after being transported along the Silk Road from China, and the Spanish brought specimens to Central and South America in the 1500s.
When Europeans came to North America, they brought trees and fruits.
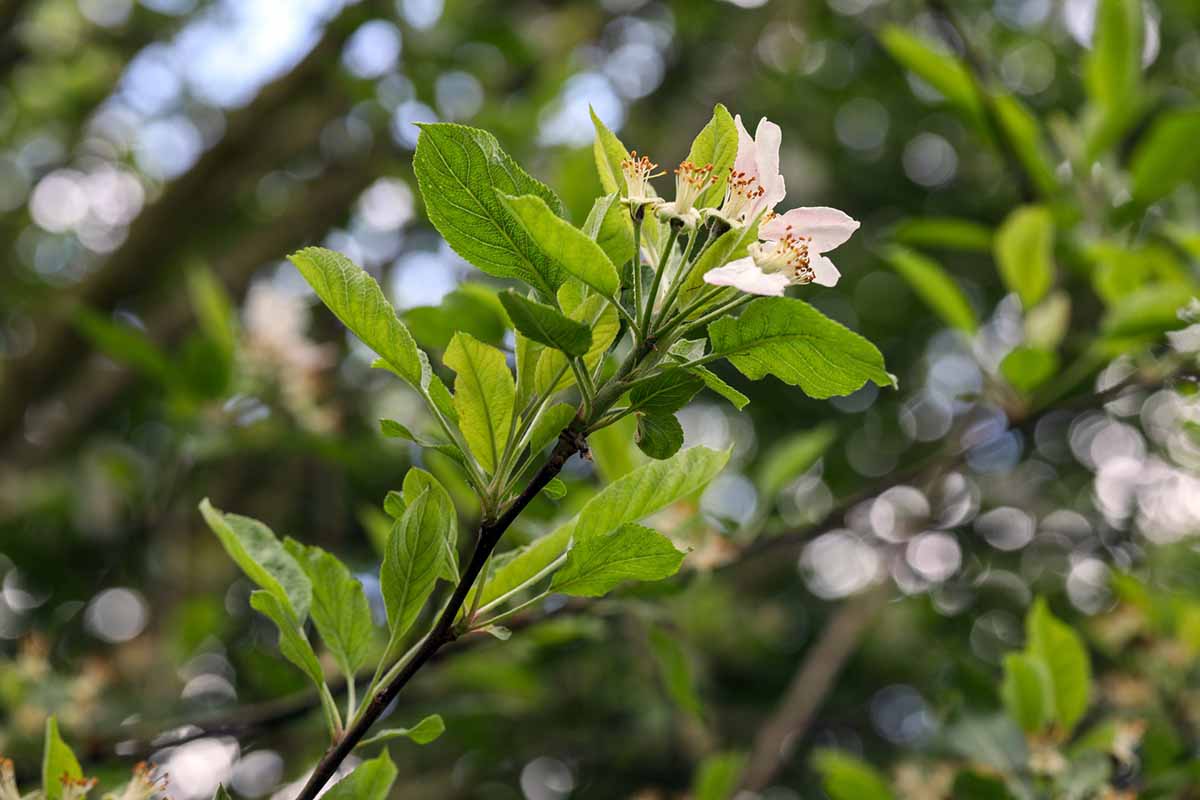
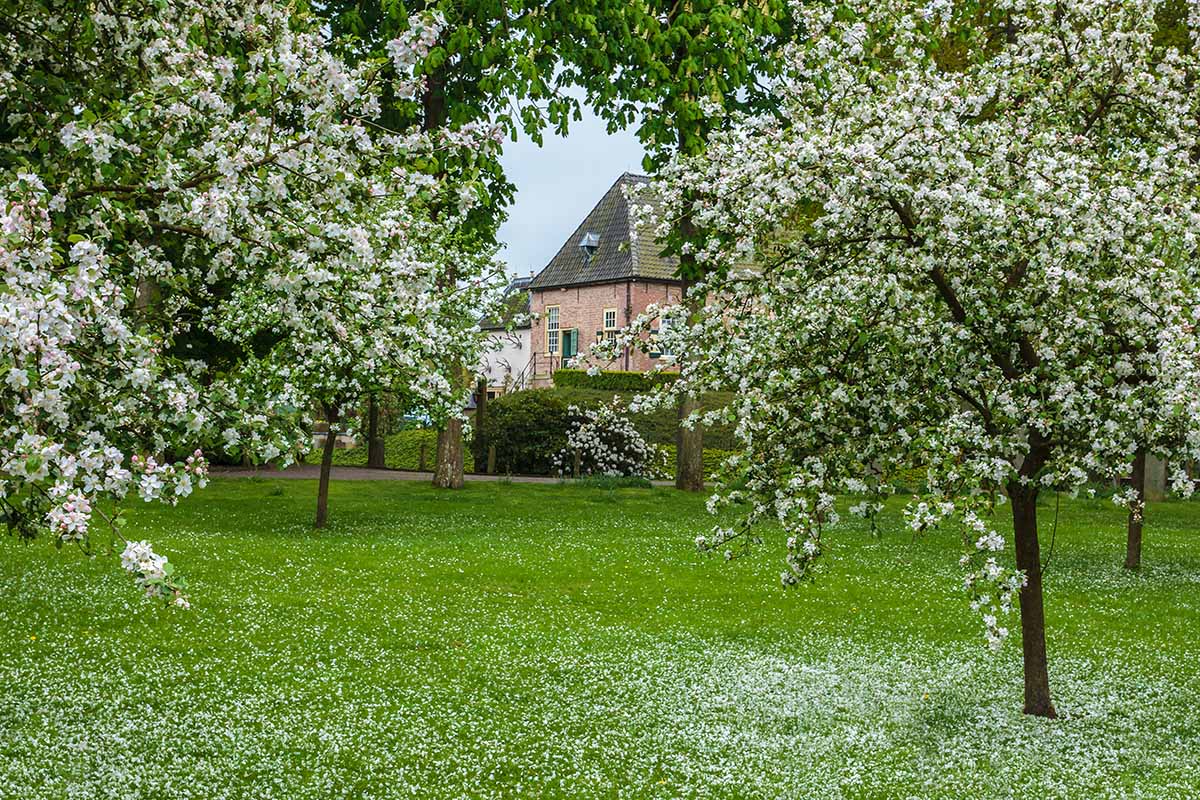
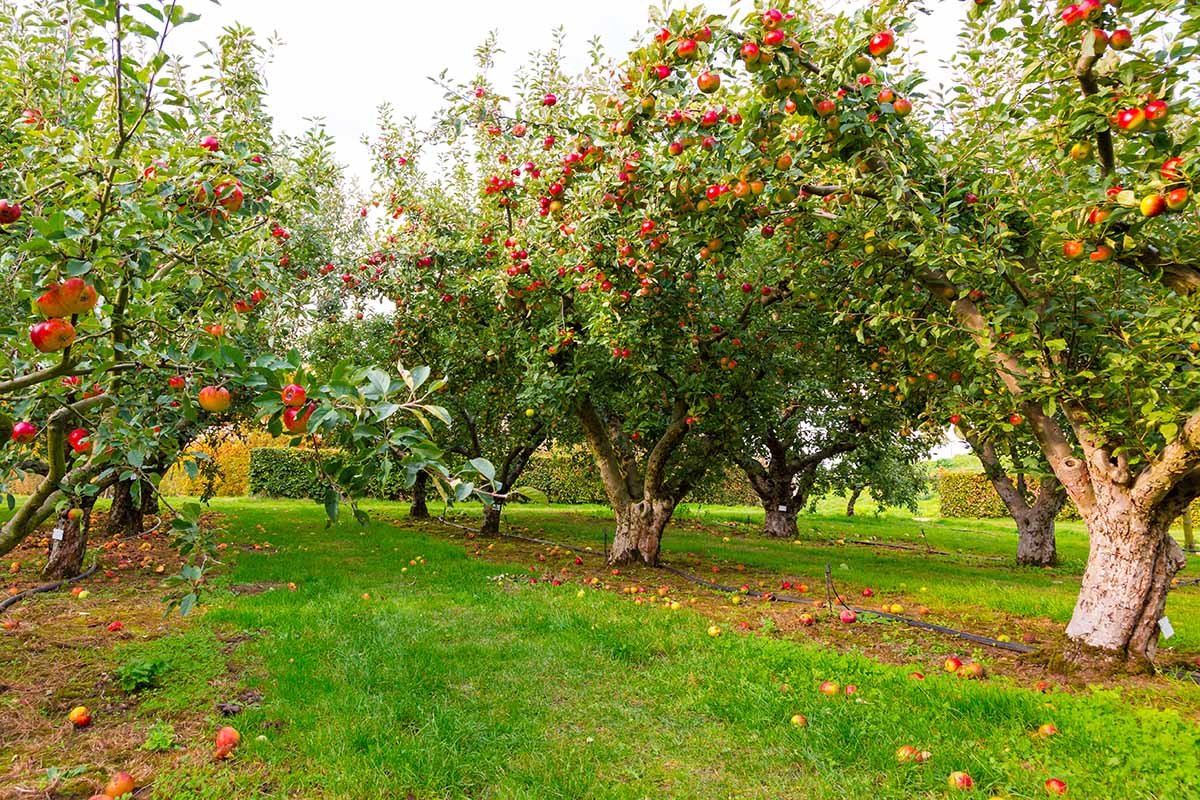
The white or pink flowers and the leaves bud out at about the same time, unlike some fruit trees such as cherries, which send out their flowers before the foliage.
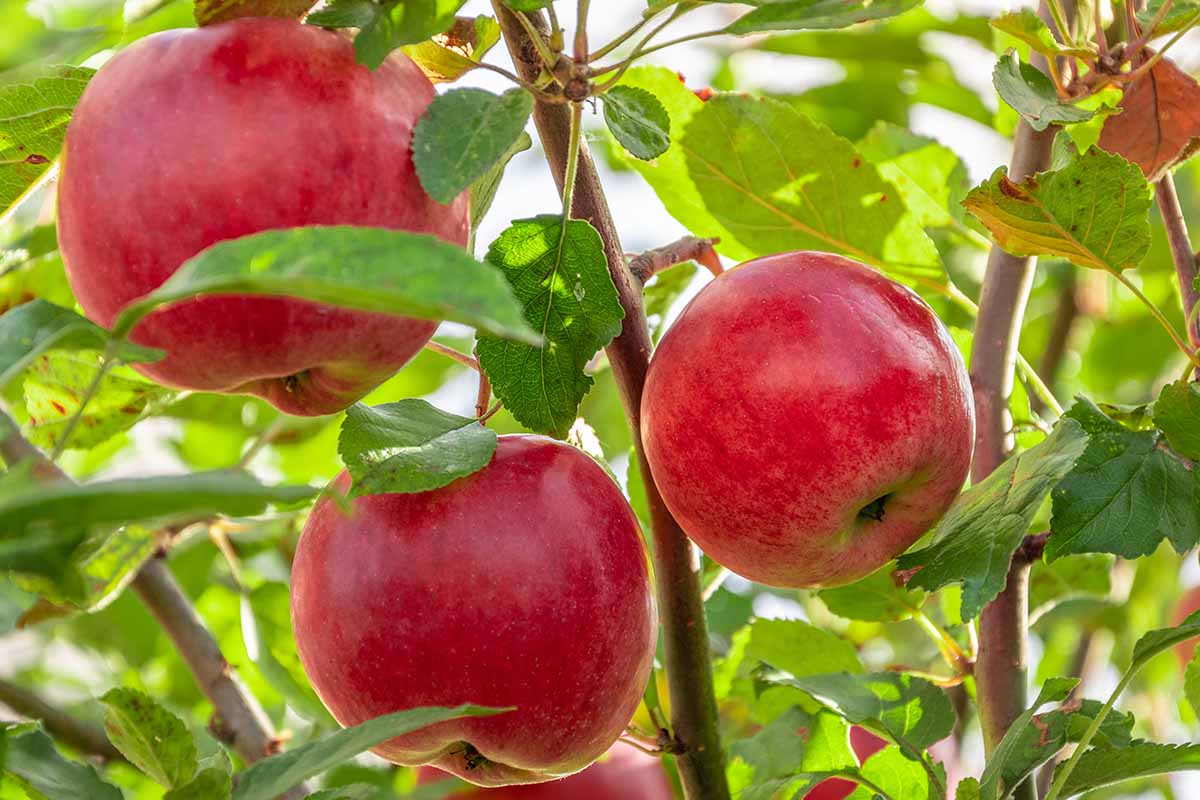
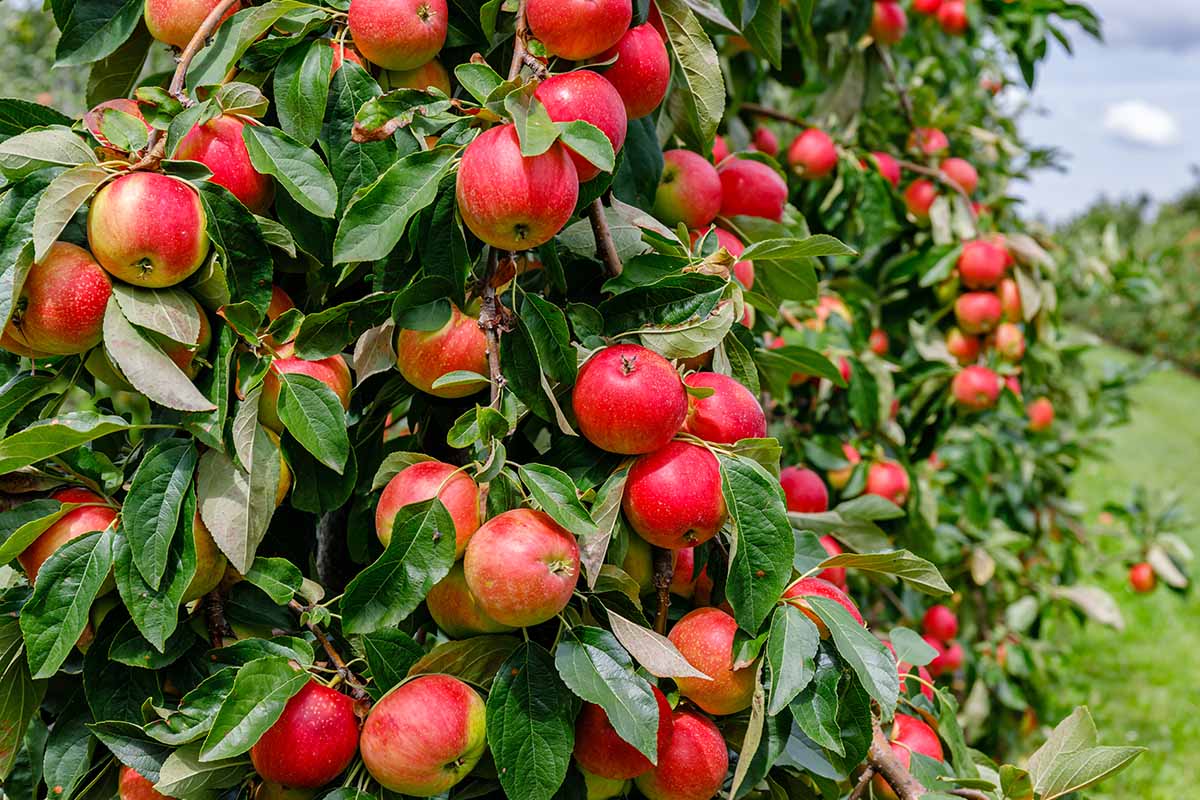
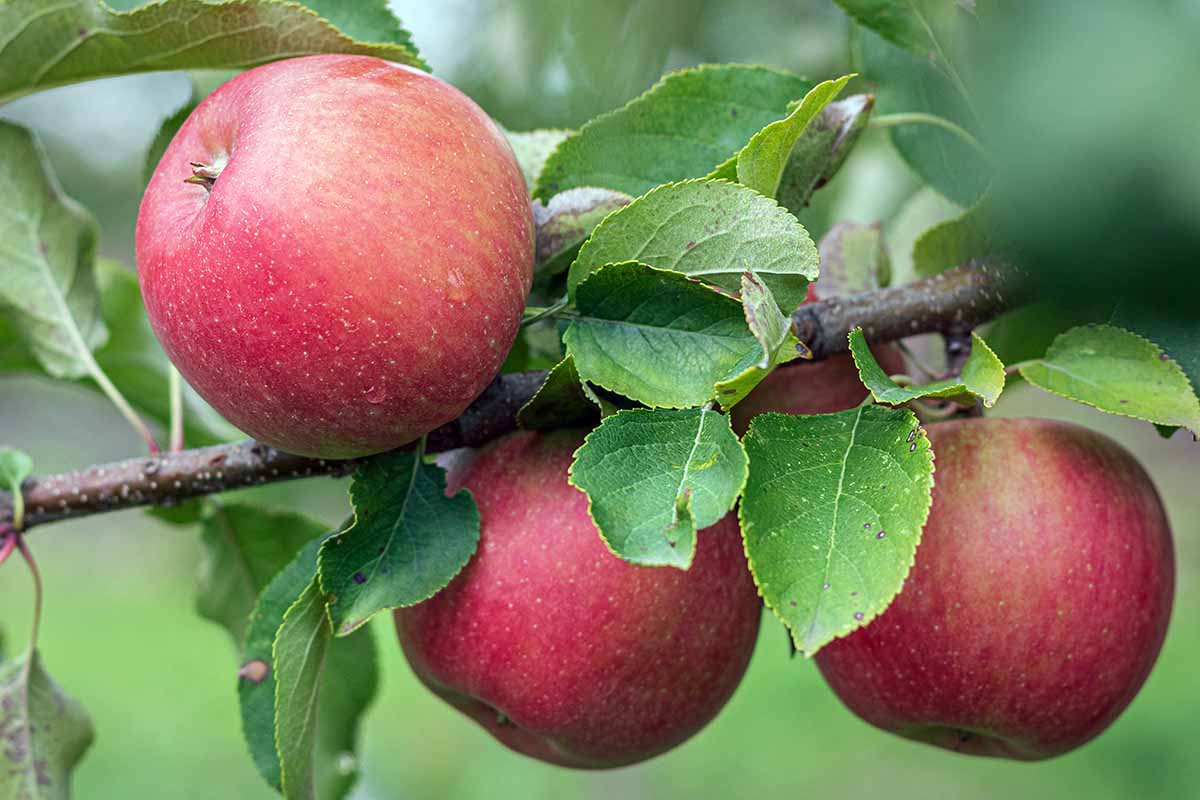
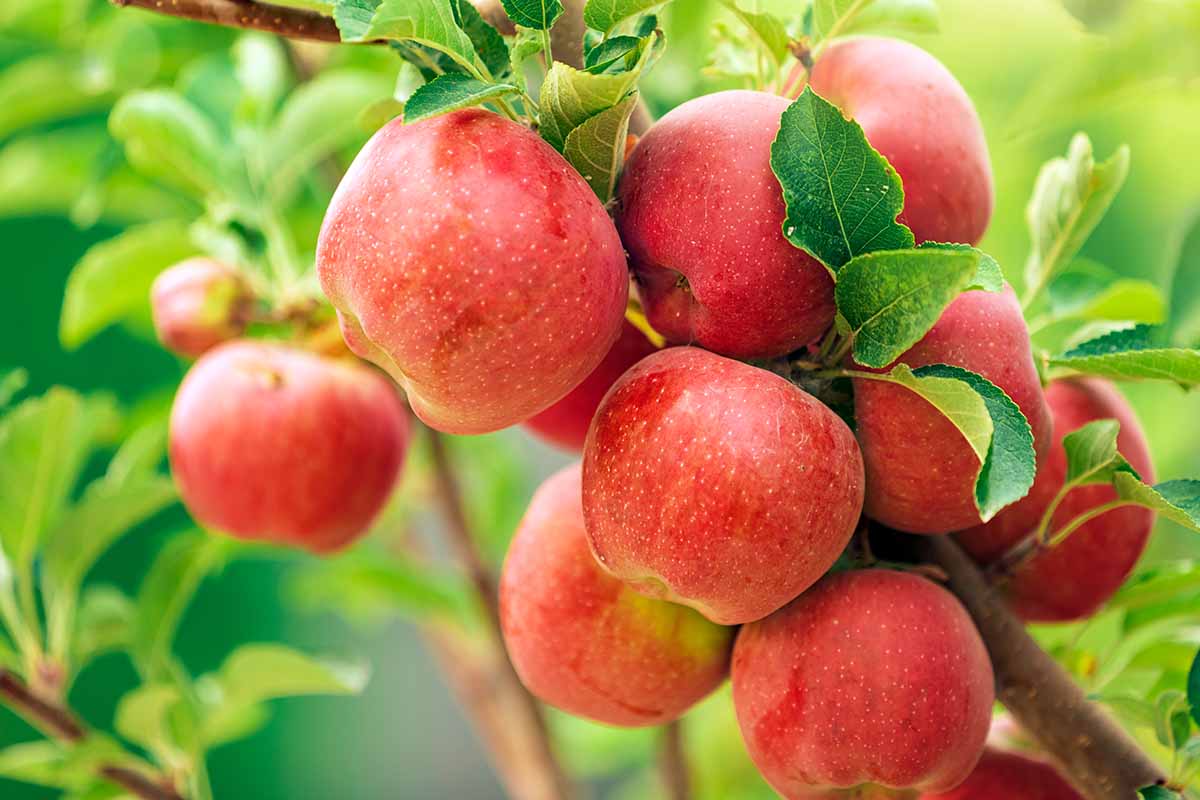
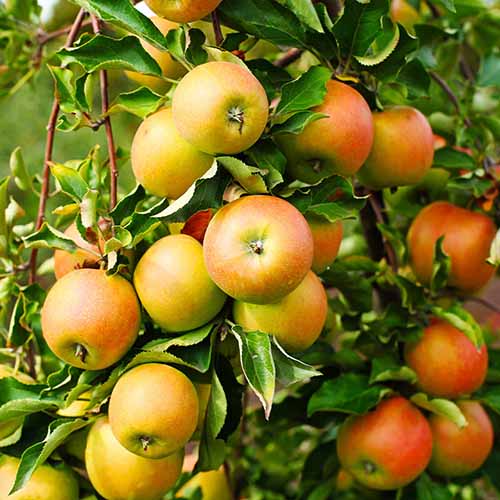
Once the flowers drop, fruits, which are technically pomes, begin to develop in the same spot. A pome is a type of fruit that develops around a core that contains multiple small seeds.
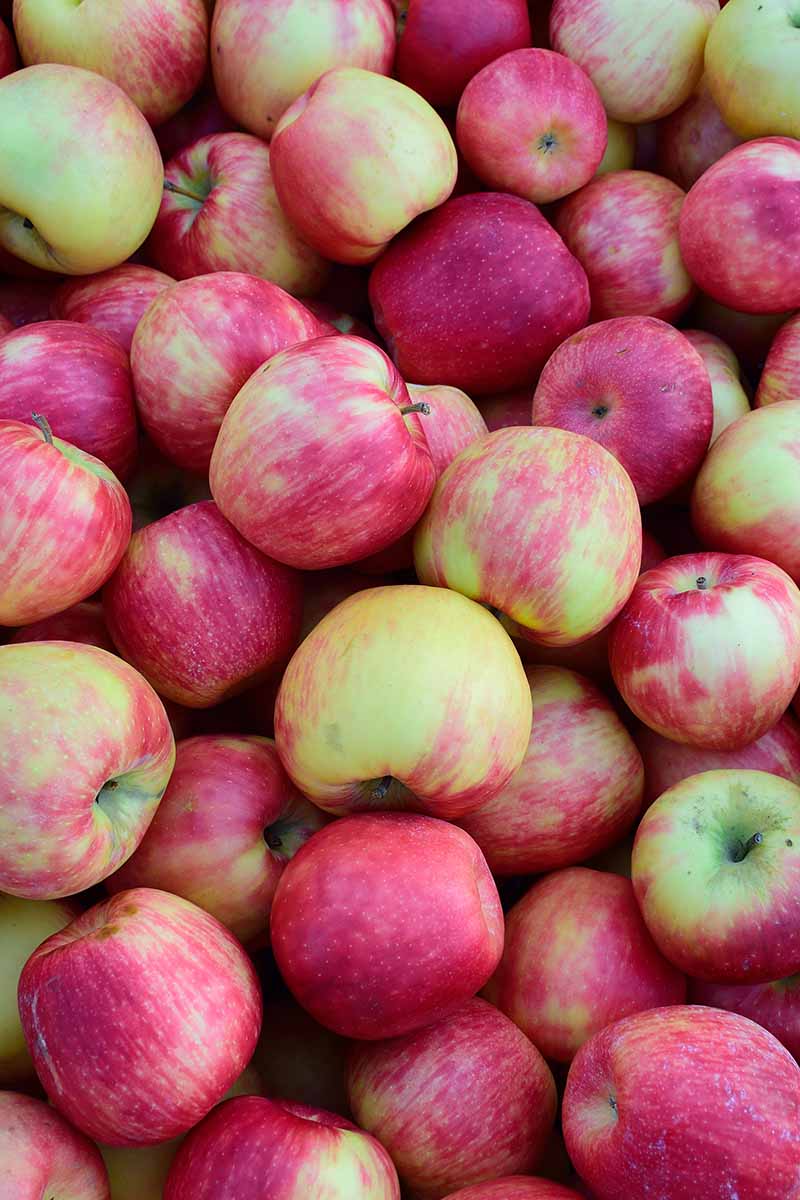
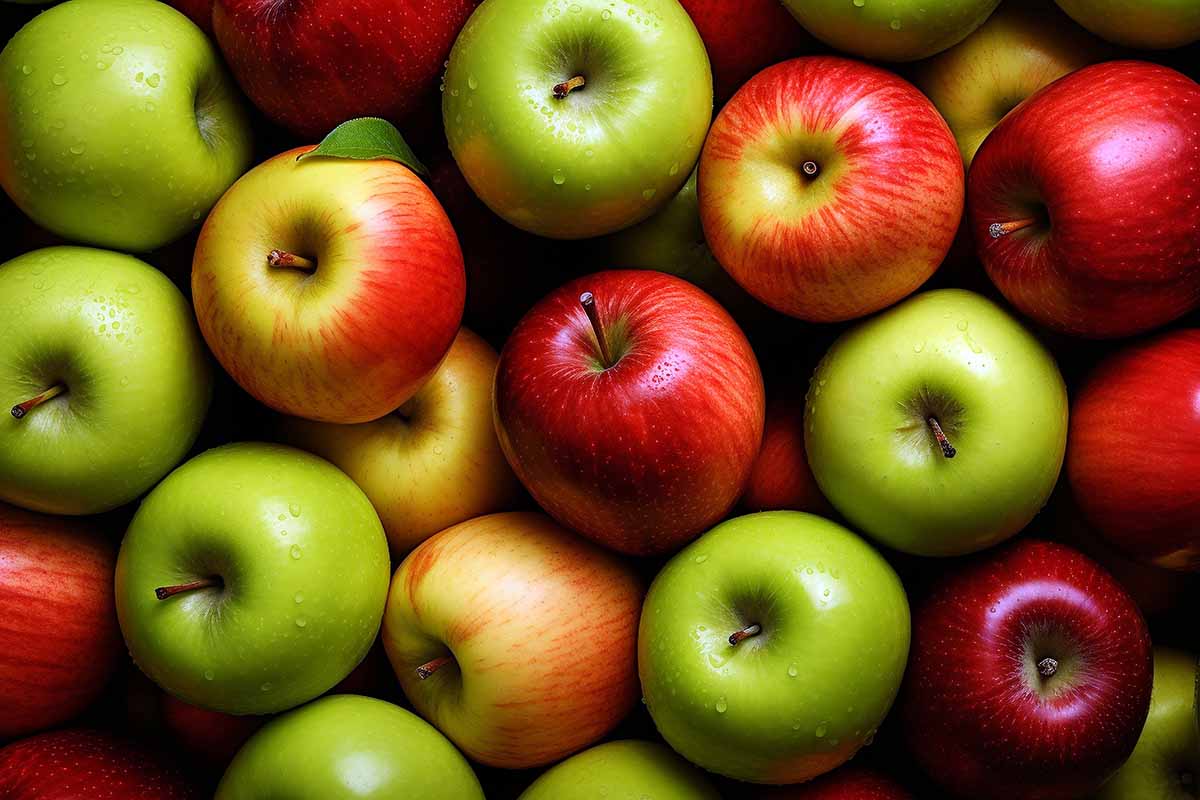
These fruits develop on shoots and spurs. When mature, the pomes can range from pale yellow to nearly black, but most are green or red to some degree.
The fruits are covered in epicuticular wax, which is a waxy coating that forms over the surface. Some have a thick layer, which helps them last longer in storage, while others have only a thin layer.
But before we get our hands on those fantastic fruits, the flowers must be pollinated. This can be one of the more confusing aspects of growing apples.
Apple trees can be categorized as self-fertile, diploid, or triploid. Most of them are diploid, which means they have two sets of chromosomes and require a partner for pollination.
Triploids have two sets of chromosomes and are what is known as “pollen sterile,” which means they can receive pollen but don’t provide good pollen for other specimens.
If you are growing a triploid apple, you’ll need two other partners to make sure they are all successfully pollinated.
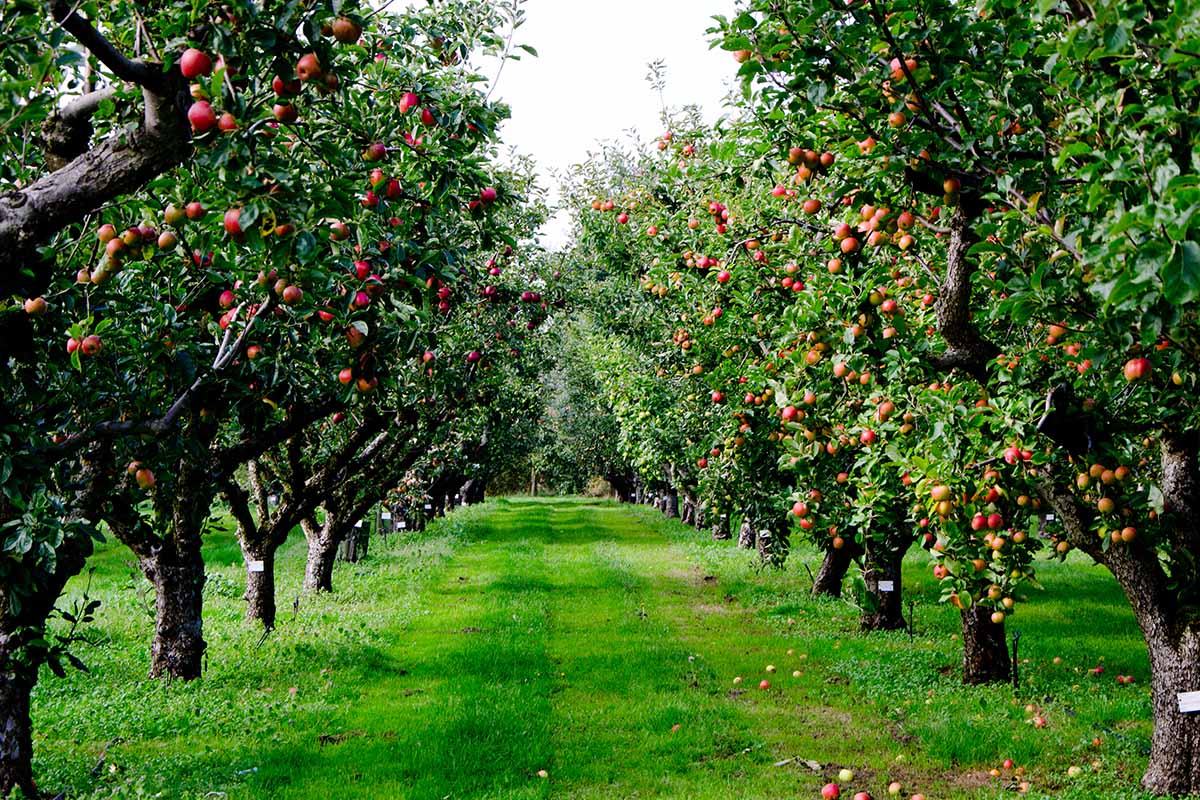
Apples are typically grafted, using a rootstock for the bottom and a scion for the top part.
Dwarf rootstocks produce specimens under ten feet high, semi-dwarf are up to 15 feet tall, and standards are more than 15 feet tall.
Most apples are grown commercially in China, with the US and Turkey a distant second. Within the US, Washington produces well over half of the nation’s apple supply.
Apple trees are suitable for cultivation in Zones 4 to 9.
Apple Tree Propagation
Don’t bother trying to grow apples from seed.
It can be a fun project if you want to experiment with germinating seeds, but it won’t result in a tree that looks anything like the one the seed came from, and the fruits might not even be tasty at all.
The specimens you find at the garden center or plant nursery are almost always grafted.
If you want to reproduce a specimen that you like, taking cuttings or grafting are your two options. Or, you can always start with a purchased plant.
Let’s start with propagation via stem cuttings.
From Cuttings
It’s entirely possible to grow apple trees from cuttings, but “possible” doesn’t mean easy or always successful.
Cuttings can be difficult to root, and the success rate is low, but don’t let that hold you back if you want to give it a try. Start three cuttings for every specimen you want to grow because the failure rate is pretty high.
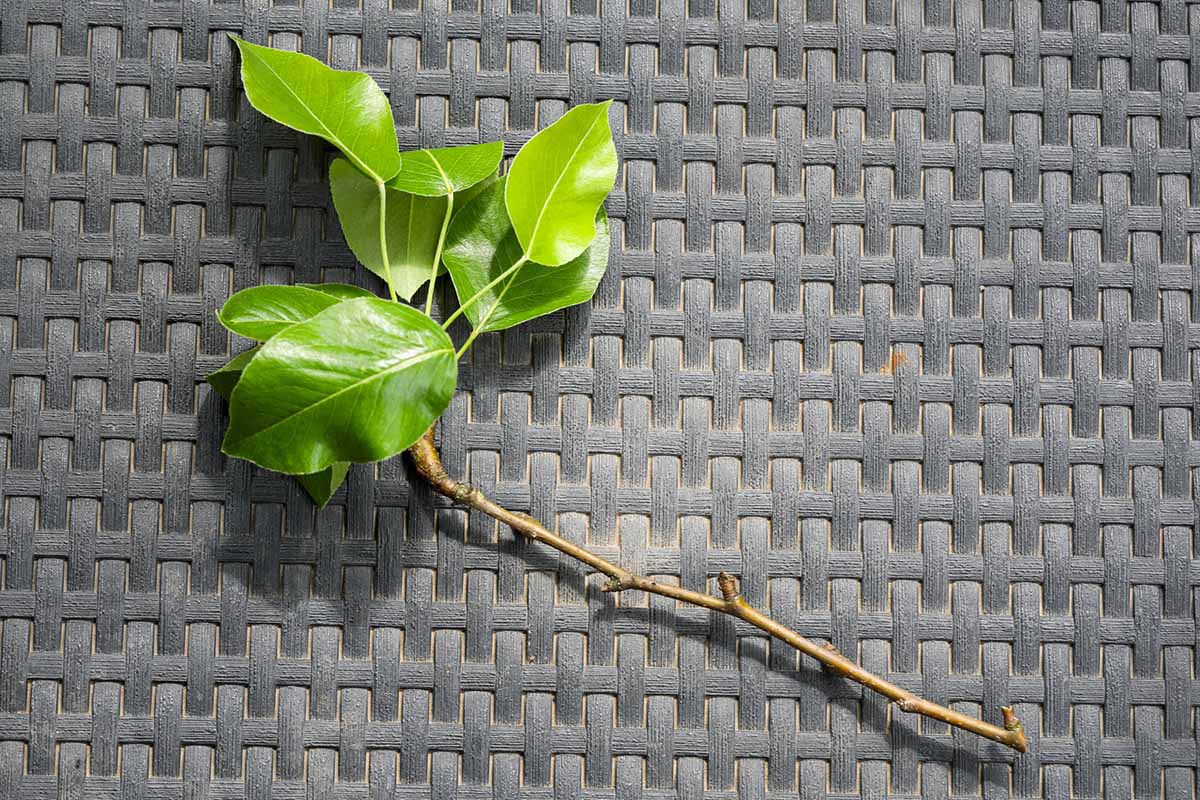
Take your cuttings in late winter when the tree is dormant, but the wood isn’t frozen. Look for a branch that is about the diameter of a pencil and take a cutting about nine inches long.
Fill a gallon-size pot with a mix of one part sphagnum moss and one part sand by volume. Moisten the medium.
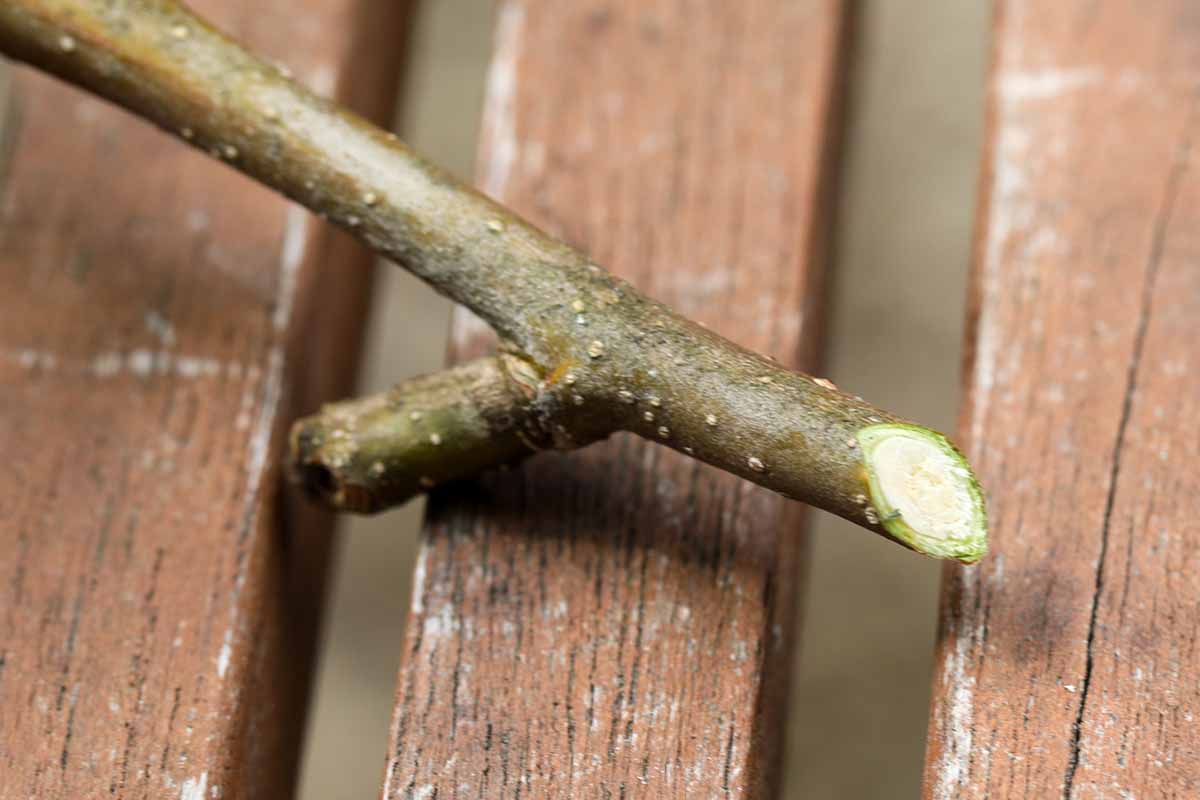
Snip the cut end at a 45-degree angle and dip it in rooting hormone. If you don’t already have some rooting powder in your gardening toolkit, it’s handy to keep around.
Grab yourself one and a quarter grams of Bontone II Rooting Powder by Bonide at Arbico Organics.
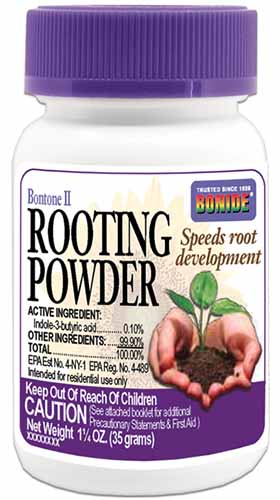
Bonide Bontone II Rooting Powder
Poke a hole in the center of the medium and gently insert the cutting so it sits a few inches deep. It should be buried by about a third. Firm the medium up around it.
Place a tomato cage or bamboo stake in the medium to act as a support, and then tent plastic over the cutting. This creates a mini greenhouse environment.
Set the pot in bright, indirect light and mist the cutting daily. You should also check to make sure the medium is moist. It should feel like a well-wrung-out sponge at all times.
When new leaves have started forming, you can gently lift up the cutting to look for roots. Don’t do this too often as it disturbs all the fine root hairs, and they will need to regrow. It can take anywhere from a few weeks to months for the leaves to develop, so don’t lose hope.
If you see roots, replace the cutting in its pot and remove the plastic cover. Once the weather has warmed in the spring, you can move the container outside into a sunny spot, but make sure you do this gradually.
On the first day, the plant should be in the sun for no more than an hour. Add an hour each day over the course of about a week.
At that point, you can leave the plant outside in its pot until the fall, when you can transplant it into its permanent location. Be sure to keep the medium moist in the meantime.
If there is little growth on your cutting, meaning just a few initial leaves but no branching, by the time fall rolls around, bring it back indoors into a sunny spot and keep it there over the winter. Then, harden it off in the spring before transplanting.
From Grafted Rootstock
As I mentioned, most apple trees are grown on grafted rootstock.
This allows growers to combine the size, cold hardiness, and other characteristics of one type of apple with the fruit size, bloom time, and characteristics of another.
This is the best way to control what kind of tree you’ll grow.
If you want to reproduce a tree that you like, grafting, rather than taking cuttings or trying to start seeds, is the best way to do it for the greatest chance of success.
There are two different parts of the tree from two different varieties in this process.
The first is the rootstock or understock, which is the bottom portion from just above the soil line and including the roots. The scion is the top part of the plant, which includes the trunk and canopy.
Collect your scion wood during the winter, in the morning on a day where the temperature is above freezing.
You want to choose a branch that’s between a quarter and three-eighths of an inch in diameter.
The length should be between 12 and 18 inches long. You can also purchase scion wood, if you prefer.
Wrap the cut end in moist paper towels, place the whole stem in a plastic bag, and put it in the refrigerator. Keep the paper towels moist and watch for any mildew forming in the bag. If it does, swap it out for a new bag.
The reason we take cuttings in the winter is because the branches might be damaged or the buds might start to emerge before we’re ready to graft if we leave them on the tree.
Once the buds on the tree that you took the scion from start to swell and open, you can start grafting. Be sure to do the work before the flower buds fall from the tree.
Purchase or obtain a rootstock from a friend. Rootstocks can be produced by starting seeds or layering, though seed-started rootstocks tend to produce unruly, large trees that are prone to pests and diseases.
Best to stick with one of the many excellent options that have been bred by growers specifically as rootstocks, like ‘Bud 9’ (aka ‘Budagovsky 9’), ‘Geneva 30,’ ‘Geneva 65,’ ‘Malling 7,’ and ‘Malling 26.’
The Malling series is often sold as just “M” followed by the number, and they are the standard for apple rootstocks.
Plant the rootstock as you would a purchased plant in your intended growing area.
Now that you have both parts, cut a slice down the middle center of the rootstock trunk using a clean grafting knife. Insert a stick or chopstick into the cut you made to hold it open.
If this is your first foray into the world of grafting and you don’t already have a knife, I strongly encourage you to get one.
You can get away with using tools you have lying around, but you’ll be able to make more precise cuts and there’s less chance of injury if you use the right tool for the job.
A.M. Leonard makes an excellent folding option with a rosewood handle.
Their knives can stand up to some serious abuse and last a long, long time – even if you happen to be one of those people who are tough on their tools, like me.
Pick up one of your own at the A.M. Leonard store via Amazon.
Now, take that same knife and cut a “V” shape out of the cut end of the scion wood by making a single, sloping cut on each side. This “V” is going to fit into the cut that you made in the rootstock.
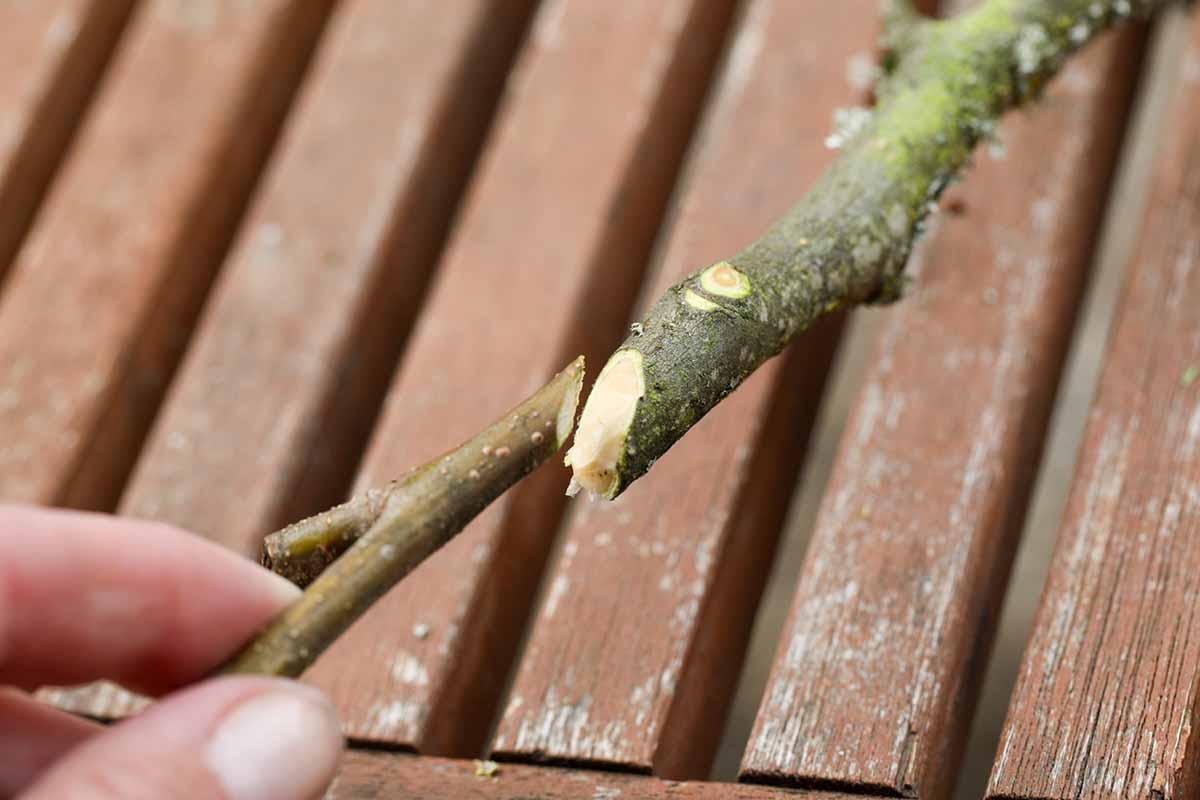
Insert the scion into the rootstock. Your goal here is to match up the cambium layers of the scion and rootstock, not the bark to the bark.
The cambium is the layer in between the center of hardwood and the bark on the outside. That means the scion will likely be off to the side rather than dead center.
If you have a large rootstock and your scions are on the smaller side, you can place two scions into the cut.
Grab some grafting or electrical tape and wrap it around the rootstock to seal the scion and rootstock together.
At this point, you can just allow the specimen to grow as any other young apple tree. Once new growth forms and both the rootstock and scion start to grow, remove the tape.
Transplanting
Before you transplant, plan to conduct a soil test and amend the soil as needed. We talk about this more in the following section.
Plant in the spring or fall and place full-sized trees about 20 feet apart, semi-dwarf 12 feet apart, and dwarf specimens about six feet apart.
We have a guide that can walk you through the specifics of how far to space your fruit trees if you’d like to take a deep dive.
If you’re growing your apple trees in an area with existing turfgrass, remove the grass with something like a grub hoe so that you have a circle about four feet in diameter.
Next, dig a hole twice as wide and about six inches deeper than the growing container or twice as wide and a bit deeper than the bare roots.
If your soil is compacted, clayey, or sandy, work in some well-rotted compost. This will give the young plant a fighting chance to get established, though those growing in clayey or sandy ground will have slower growth and production than those with more ideal soil.
Remove the plant from its container and loosen up the rootball. Chances are the roots are circling the inside perimeter of the container. If you don’t loosen them up and aim them out and away from the trunk, you run the risk that they will girdle the trunk and kill it.
You can obviously skip this step if you have a bare root plant.
Place the plant in the hole so that it sits at about the same level as it did in the pot, or so that the graft point is situated an inch or so above the ground for bare roots.
This means you might need to build a slight mound at the base of the hole you made. Fill in around the roots with soil.
Add some water and if the soil settles, go ahead and add a little more.
How to Grow Apple Trees
There are two things apple trees must have to thrive that you can’t change after you plant them: well-draining soil and lots of sun.
They need at least six hours of sun per day, though they won’t complain if you give them a touch of dappled shade in the afternoon when the heat is strongest.
Well-draining soil is a must. Encountering a disease is a matter of when – not if – if you plant in soil that doesn’t drain well. Avoid growing in low-lying areas or depressions where water pools.
If you have a northern or eastern slope, that’s the perfect spot.
While they’re demanding about the need for well-draining soil and lots of sun, these trees are pretty laid back about soil quality. In fact, they do better in moderate-quality soil. It doesn’t need to be rich, and it shouldn’t be depleted, but something in between.
The trees prefer loose, loamy soil, but the more important aspect is pH.
The soil should be slightly acidic to neutral, with a pH between 5.8 and 6.5. If your soil is outside of this range, it will impact how the tree takes up nutrients, potentially leading to deficiencies.
Test the soil and amend it as necessary before planting. If you alter the pH, you will need to continually amend the soil every year or so to maintain this pH change, but be sure to test the soil before doing so.
Wood ash is a good way to alter the soil pH in a more alkaline direction without having a huge impact on the environment, but it only has a small impact. To make bigger alterations, you’ll need limestone. To make soil more acidic, use elemental sulfur.
You don’t need to feed these trees when you transplant. In fact, you don’t need to fertilize until the trees are four years old, or the first year they produce a full-sized crop.
Before you feed, you’ll want to do a soil test. It does no good to feed your soil with a bunch of nutrients that your tree doesn’t need – or leave out something essential that’s lacking.
Assuming you have average soil, grab a granular fertilizer formulated for fruiting trees.
Down to Earth makes a fruit tree formula with an NPK ratio of 6-2-4, which is a good balance of nitrogen (N), phosphorus(P), and potassium (K) for apples.
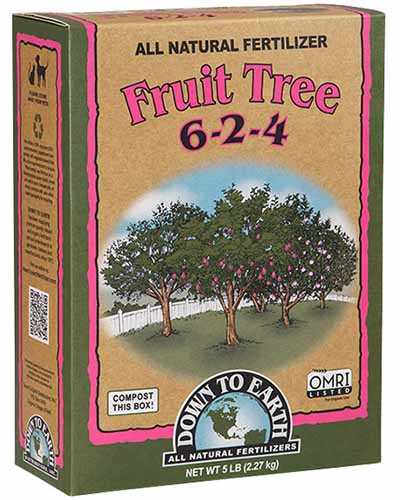
Down to Earth Fruit Tree Fertilizer
You can find a five-, 15-, or 25-pound compostable container at Arbico Organics.
When you fertilize, apply it inside the drip line but avoid applying any within a foot of the trunk. If you aren’t familiar with what the drip line is, it’s the area underneath the outer canopy of the tree.
If you picture the tree as an umbrella with the water running down the material and landing on the ground, that’s the drip line.
When it comes to water, young specimens need more irrigation than mature trees do. How much water to provide depends on your soil, the tree’s location, the amount of sunlight it receives, and more.
Confused? It’s fairly easy to determine. Get yourself a rain gauge and read our guide to apple tree watering to learn all the details.
Place a layer of organic mulch like leaf litter or wood chips underneath the canopy of the tree to help suppress weeks and retain water. Just don’t let it touch the trunk.
Pollination
Whatever type of apple trees you grow, with few exceptions, you must have another specimen nearby so they can pollinate each other.
Trees should be within 100 feet or so for pollination purposes.
Most apple trees can’t pollinate themselves, and if the flowers aren’t pollinated, no fruits will form. To make it even more complicated, only specific trees can pollinate each other. Not just any old tree will work.
Apples are categorized into six flowering groups based on what time of year they blossom. These groups are early, early to mid, mid, mid to late, late, and very late, sometimes represented by the numbers one through six. One is the earliest, and six is the latest.
For trees to successfully pollinate each other, they must both be from the same flowering group or the group immediately before or after. So, for example, a mid season bloomer can pollinate an early to mid, mid, or mid to late tree.
The trees must also be of different varieties, so you can’t use a ‘Gala’ to pollinate another ‘Gala.’
Then there are the triploid types, which require two other apple trees for successful pollination.
Visit our guide to apple tree pollination to learn more about how this all works and to discover some productive combinations.
There are also some partially self-fruitful options that will give you some fruit even if you only have a single tree. They will be more productive if you have a partner, though.
You also have the option of growing a crabapple (Malus spp.) as a companion instead of another apple.
Crabapples bloom for a much longer period than apples and will pollinate any group. You could have one crabapple to pollinate six different trees from all six flowering groups.
Many commercial growers opt to go this route.
While we’re talking about pollination, it’s a smart idea to plant early-blooming pollinator favorites near your trees.
Pansies, wood poppies, crocus, daffodils, tulips, bleeding hearts, flowering quince, forsythia, and Japanese camellias all bloom at the same time as apples and attract our bee, moth, and butterfly friends.
Growing Tips
- Plant in full sun with at least six hours per day and in well-draining soil.
- Apply fertilizer only after the tree has produced its first full-sized crop.
- Most apples need a different cultivar partner for pollination.
Pruning and Maintenance
For the best fruit production, you need to prune your apple trees annually.
Spring is usually the perfect time unless it’s raining nonstop with no signs of stopping. Then, you might opt to do your work in the fall or on a sunny day in winter.
Moisture is an invitation for pathogens to infect your tree, so it’s best to avoid working in wet conditions.
When you prune, there are two goals in mind. You want to provide the best shape for the tree’s optimal health and production, and you want to maintain your previous year’s work.
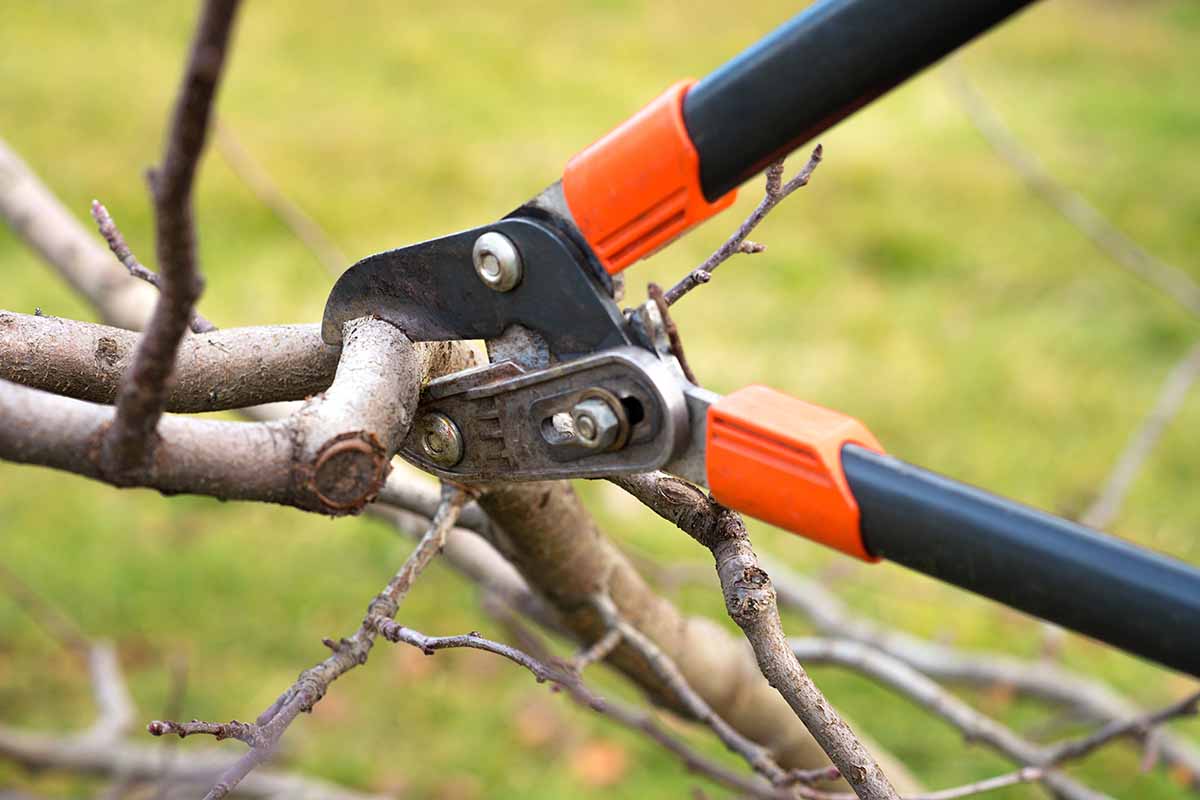
First off, take off branches that are damaged, diseased, dying, or deformed.
We call these the “four Ds,” with deformed meaning any branch that is rubbing against another branch, crossing another branch, or that has a funky bend or shape.
You should also remove one of any branch pairs that have a tight crotch. That means where the two branches join the limb or trunk at about the same place, making a tight “V.”
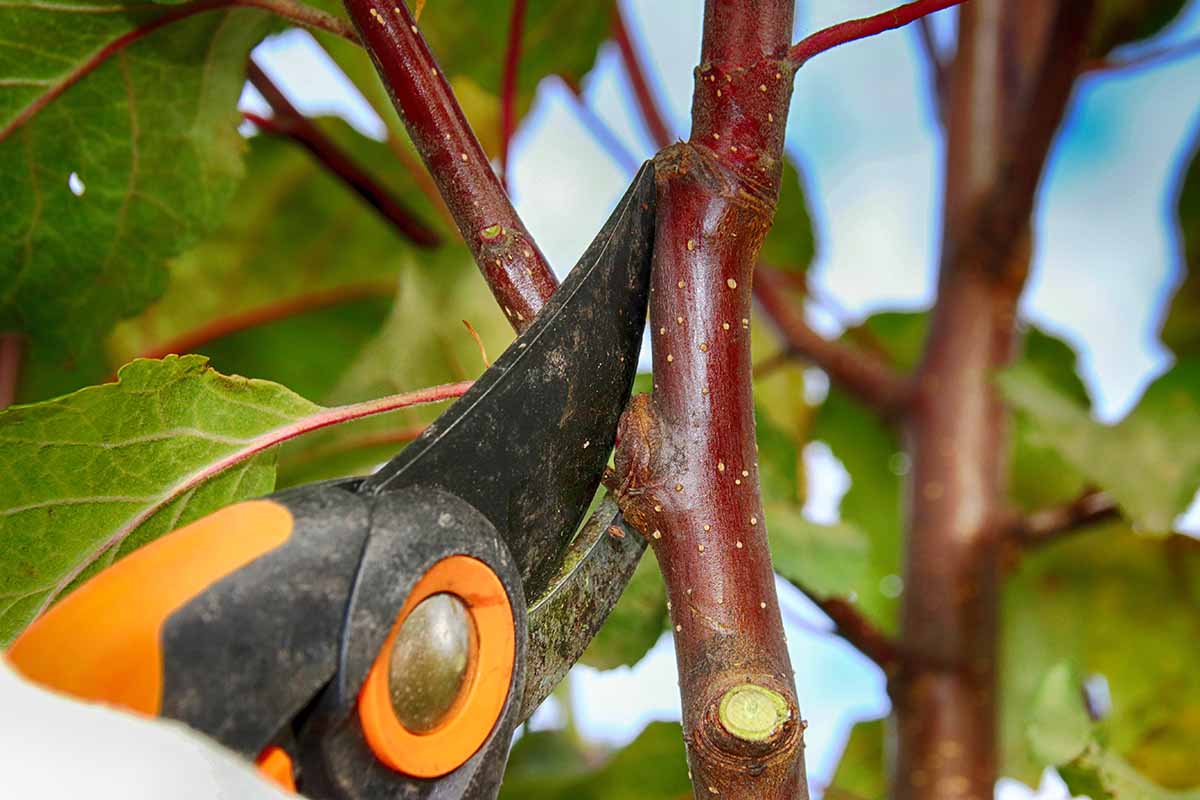
These are weak points and one of them has to go. Remove any water sprouts.
Finally, just generally tidy up the tree by thinning out crowded areas. Leave a good mixture of young, new branches and older, healthy branches.
You can learn more about apple tree pruning in our guide. (coming soon!)
During the winter, watch for sunscald and paint your tree with watered down paint if you see cracks forming.
You might also want to heap organic mulch on top of the roots to keep them warm – just make sure its not touching the trunk.
For those who share their gardens with moose, elk, and deer, winter is the time these hungry hoofers can be a nuisance, so put up fencing, grab your favorite deterrent, or wrap young trees.
Learn all about how to care for apple trees in winter in our guide.
Apple Tree Cultivars to Select
With nearly 8,000 (and counting!) different cultivars, there is going to be an apple tree that fits all your needs.
Apple trees can be successfully grown in Zones 4 to 9 and there are some that can thrive outside of those Zones.
There are apples for making juice, cider, cooking, or fresh eating. There are those bred to be extremely pest- or disease-resistant.
Some are bred to produce massive, picture-perfect fruits and others grow homely but delectable ones.
We can only touch on a few apple options here, but if you want some more ideas, visit your local gardening club, extension office, or nursery.
They will have some excellent suggestions for cultivars that will do well in your area. Not every apple tree will thrive in every area, even if it’s suited to your growing Zone.
New cultivars are constantly popping up. These usually come from a chance or deliberate crossing of two trees, resulting in a promising seedling, or they come from mutations on a branch, known as bud sports.
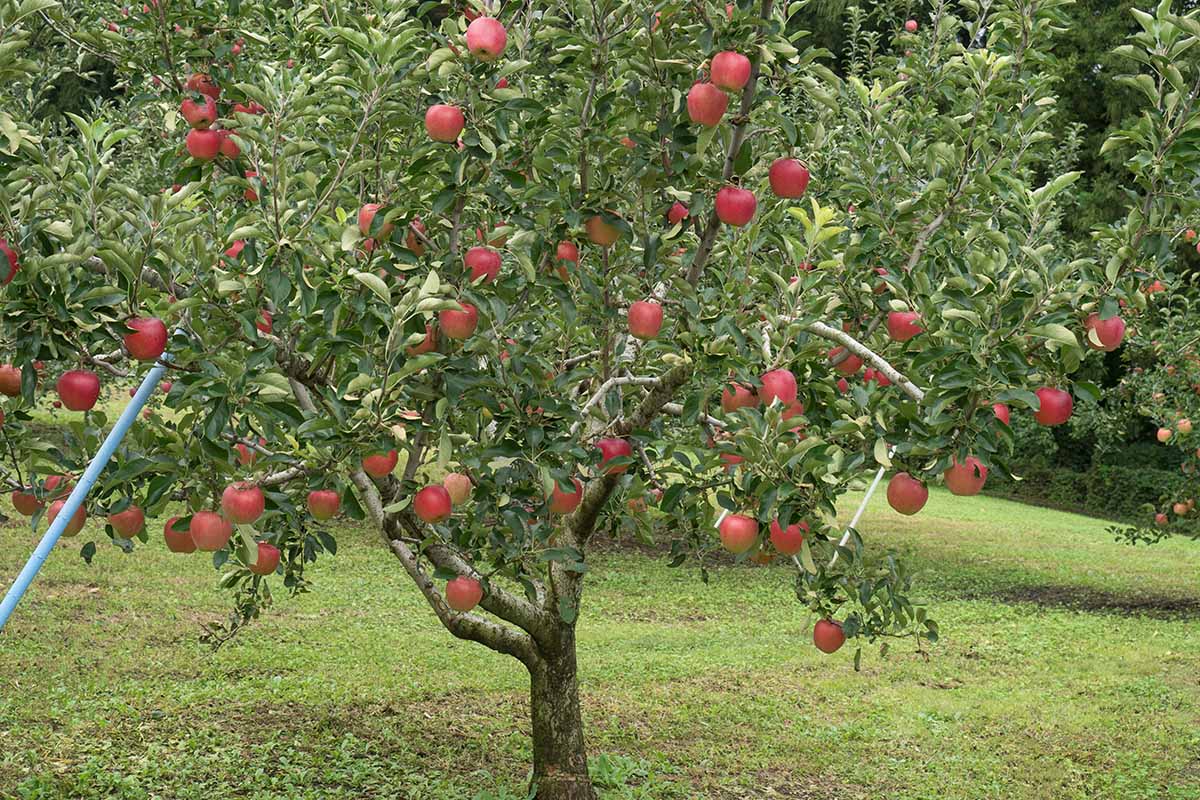
You can find dwarf, semi-dwarf, and full-sized plants. Dwarf trees grow under eight feet or so, while full-sized trees can be up to 30 feet tall.
Dwarf types tend to have weaker root systems and can topple under a heavy crop, but they fit in smaller spaces and are easy to harvest. No ladder needed!
You can even find columnar options that stay extremely narrow and stay under eight feet tall, like Tangy Green™.
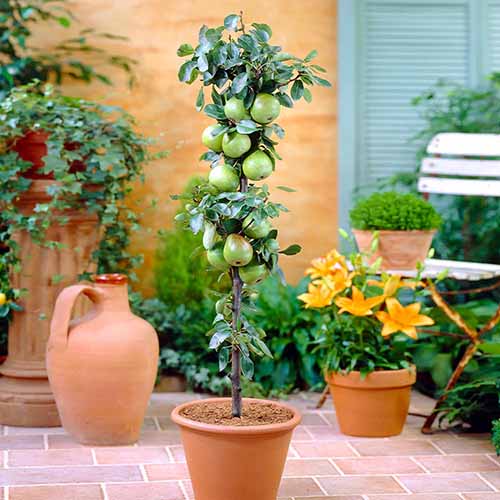
It’s available at Fast Growing Trees in three- to four-foot heights if you want one of these perfect patio options.
Before you pick your apple tree, make sure it will thrive in your area. It needs to be suitable for your USDA Hardiness Zone, and you also need to be sure that your area has the right number of “chill hours.”
Chill hours are the number of hours between 32 to 45°F that your region experiences. Some trees need lots of chill hours and some need hardly any.
Our guide to 19 of the best apple varieties give you plenty of options.
Here are a few highlights:
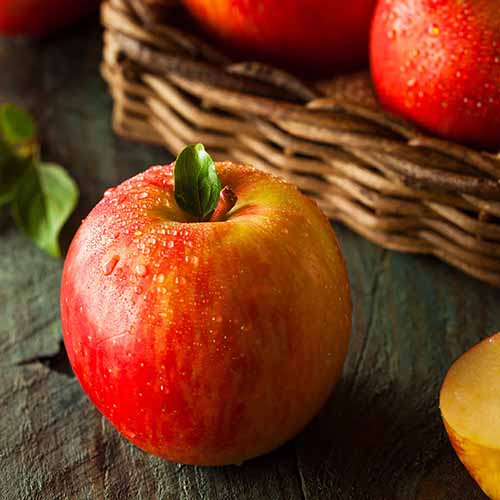
Fuji
‘Fuji’ is almost too pretty to eat with its speckled pink and yellow skin, but the juicy, crisp, sweet flesh is equally exceptional.
It’s one of those refreshing apples that is almost as quenching as a tall glass of water.
If you’re in Zones 4 to 8, visit Fast Growing Trees for a live plant in a variety of sizes.
Make sure to grab a midseason pollinator friend. This cultivar requires 400 chill hours.
Gala
If you don’t have room for multiple trees, try ‘Gala.’ It’s a tough tree that doesn’t generally suffer from pest or disease issues and it’s partially self-fertile, so you’ll have a harvest whether it has a partner or not.
Your tree will produce a larger harvest if you give it a pollinator, however, so look for one in group 2, 3, or 4.
The fruits are sweet and crisp with beautiful speckled red and yellow skin.
It’s also available at Fast Growing Trees, and you can choose from a variety of sizes. ‘Gala’ needs 500 chill hours.
Jonagold
One of my absolute favorites is ‘Jonagold.’ It blends the sweetness of ‘Golden Delicious’ with the tang of ‘Jonathan’ in gorgeous red-gold pomes.
The fruit is delicious fresh, cooked, dried, in desserts or savory dishes, and even for making cider. The tree is also fairly tough and grows in Zones 5 to 8.
The drawback, if you consider it that, is that you’ll need two other early to mid season pollinators (or one self-pollinator) since it’s triploid. It requires 700 to 800 chill hours.
Give it a ‘Pink Lady’ and a ‘McIntosh,’ for example, and you’ll be in business.
Visit Fast Growing Trees for a three- to four-foot-tall live plant.
One apple I don’t recommend? ‘Honeycrisp.’ Don’t get me wrong, they’re delicious, but maybe leave them to the commercial growers.
They’re exceptionally fussy and subject to all kinds of problems, including soggy breakdown, a disorder that impacts a few other cold-sensitive cultivars.
I understand why they’re one of the most popular cultivars out there, but I also think they’ve contributed to the apple tree’s delicate reputation.
Don’t worry, I won’t judge you if you decide to give them a go anyway. They are delicious.
You can learn more about growing ‘Honeycrisp’ in our guide.
Managing Pests and Disease
I’m not going to sugarcoat it, apples suffer from a lot of pest and disease problems. The chances are high that you will be dealing with one or more sooner or later. Probably sooner.
If you notice small spots on your apples that give way to a corky texture on the interior, it could be cork rot.
This isn’t a disease but a physiological disorder usually caused by a nutrient deficiency. Learn more about this problem in our guide.
Now, if your apples have big gaping bites out of them or they’re missing altogether, you might have friends dining on your bounty. Let’s talk about those first.
Herbivores
Deer and birds will thank you for planting apple trees. Once a tree is mature, you don’t really need to worry too much about either.
You should have a large enough harvest that there’s a little left to share with wildlife. You will need to protect young trees, though. Let’s talk about that, first.
Deer
Have you ever heard of “deer apples?” They’re the ugly or deformed fruits that orchards can’t sell at a premium, so they are sold at a discount as an option to attract deer.
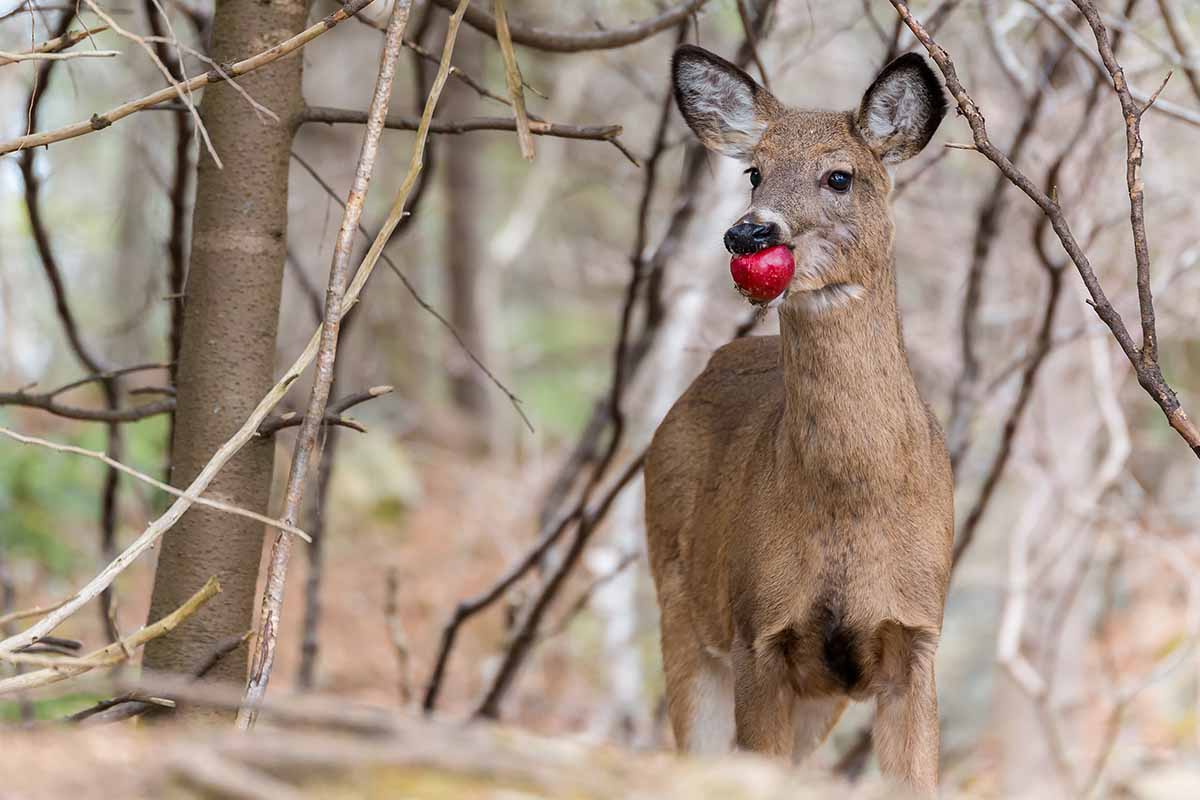
That should tell you something about how much deer like these fruits. They’ll nab any that they can reach on the lower branches.
When they’re hungry, deer will also snack on the leaves and young branches, which can reduce your harvest. On a large tree, that’s probably no biggie. But it could destroy a young specimen.
Your best option is to fence off young trees. Older trees can withstand some browsing, and you can just let deer clean up fallen apples for you.
Learn more about how to manage deer in our guide.
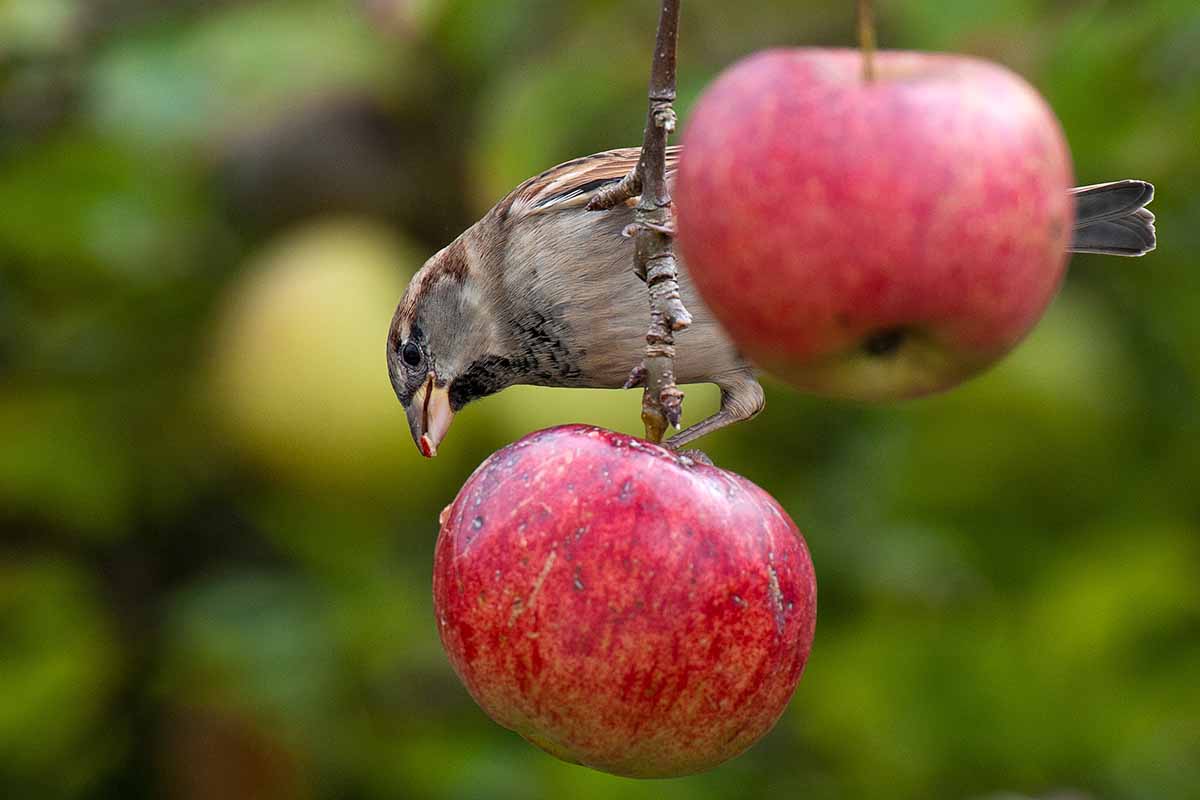
Birds
Lots of birds will eat apples, from woodpeckers to cardinals. Some people even offer up sliced apples to attract birds.
In the late fall, I love to watch the crows, jays, and flickers clean up the leftover fruits I couldn’t reach. I think their antics are charming.
But if you’d like to keep the apples for yourself, you’ll have to find ways to deter our winged friends. If you’re already bagging your fruits to prevent codling moths, which we’ll talk about in a second, you have your protection in place.
You can also toss nets over the trees in the fall as the fruits ripen. Birds won’t eat underripe fruits, so you don’t need to worry about covering them until ripening time.
I also find that if I have seed feeders, fruit and nut platforms, and suet cages out, the birds will go for those before they turn to my apples.
Smaller birds will usually only peck at pomes that are already damaged by pests or other injury, so keeping your trees healthy helps.
Insects
Insects can be a real problem in apples, not just because they spread disease, but because many of them can ruin your fruits. All that work for nothing!
Apple maggots, in particular, drive me crazy. Along with codling moths, they’re the biggest enemy standing in the way of me enjoying my fruits.
You can protect your trees from both by tying mesh bags over the young fruits. If you have a dwarf tree, you can cover all the fruits pretty easily.
On larger trees, you might have to settle for just covering those you can reach.

You can grab 1,000 bags at Amazon. Put them on once the fruits are about the size of a large grape and keep them in place until you harvest.
You also need to watch out for aphids, blister mites, borers, fruitworms, leafhoppers, scale, spider mites, tent caterpillars, and thrips.
Learn more about identifying these and controlling them in our guide to apple pests.
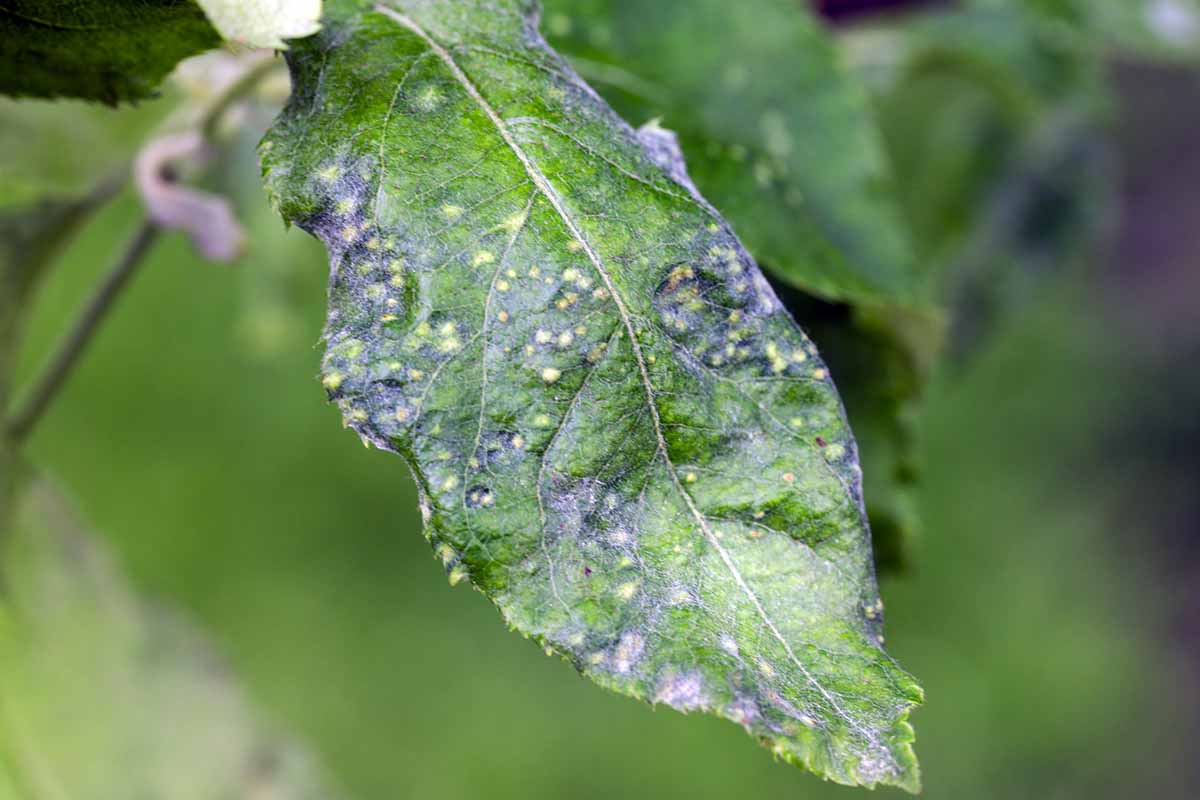
Disease
In addition to pests, apple trees have a lot of disease problems to contend with. Some cultivars are more resistant than others.
I consider myself lucky if I experience a year where I’m not trying to narrow down the cause of the symptoms I’m seeing, and treat the problem on my tree.
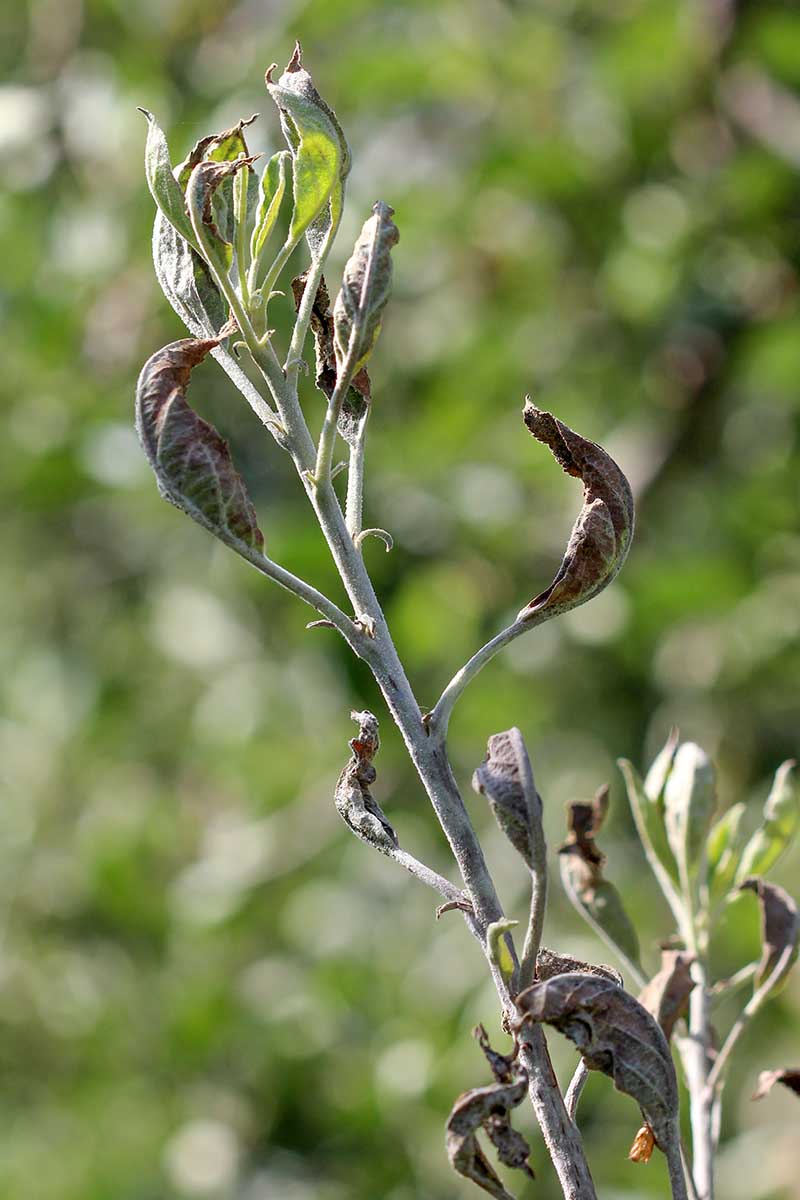
If you’d like a more detailed explanation of all the various disease issues you might face, please visit our guide to apple diseases.
Armillaria root rot is an infection caused by fungi in the Armillaria genus. Also known as honey fungus, it’s an extremely common problem in some regions and can kill trees rapidly. It lives in the soil, and there is no cure.
Read our guide to armillaria rot to learn how to identify and manage this disease, as well as how to prevent it in the first place.
Bot rot or white rot is another challenge you might face. Caused by the fungus Botryosphaeria dothidea, it’s mostly a problem on trees that are already stressed or weak.
The pathogens look for openings in the bark to invade, resulting in cankers, dark sunken areas, and girdled branches or trunks.
Learn how to control bot rot in our guide.
You might also encounter gummosis, southern blight, crown gall, black rot and frogeye leaf spot, sooty blotch and flyspeck, and powdery mildew.
Apple trees are also host to cedar apple rust, which requires a juniper nearby for the fungus to complete its lifecycle. Read more about cedar apple rust in our guide.
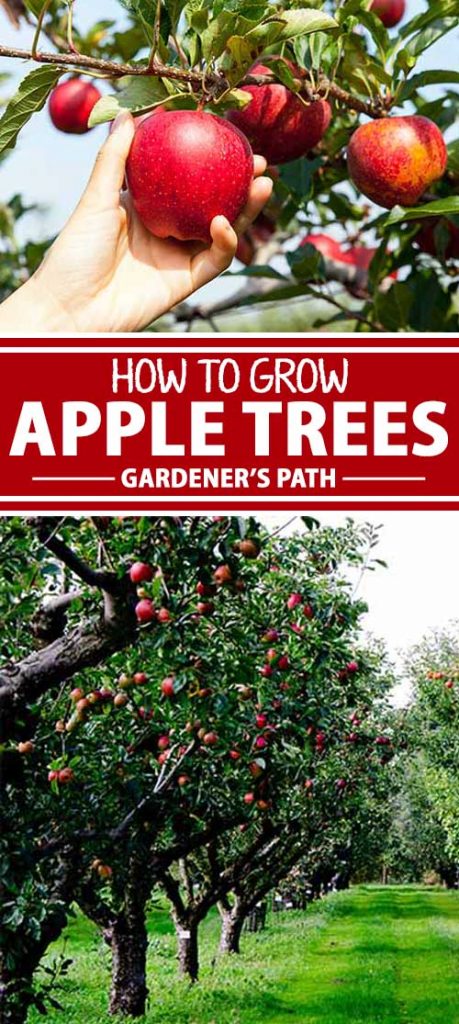
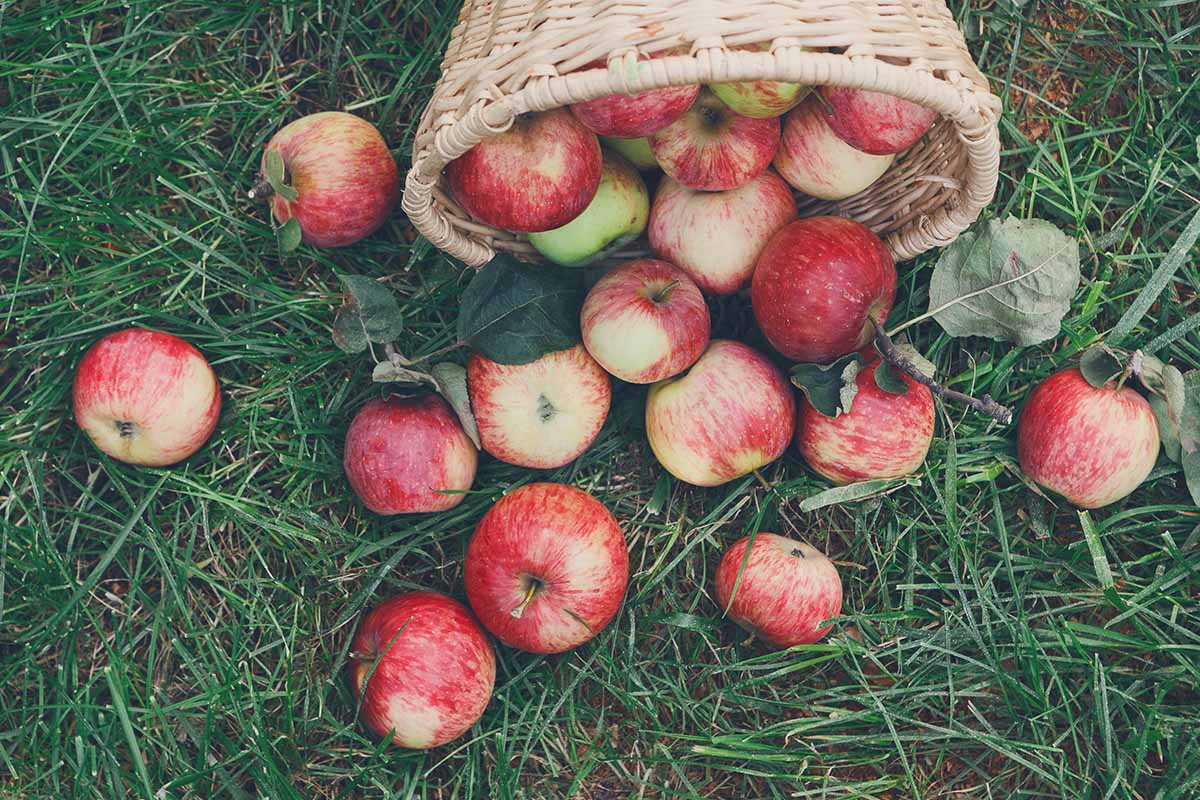
Harvesting
We’ve reached the second best part of apple growing, with the best being the moment you bite into your first fruit, of course.
My favorite way to test for ripeness is to slice up an apple and dive in once the color looks about right for the cultivar I’m growing.
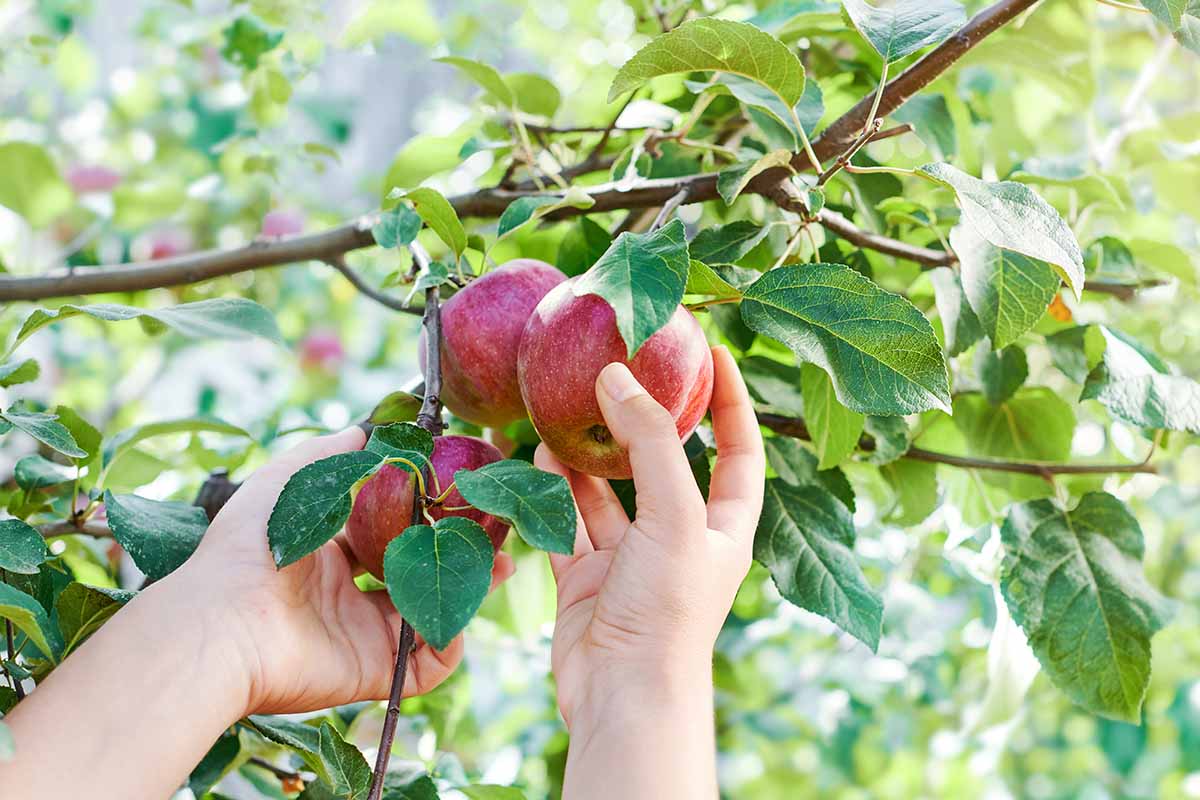
You can also estimate ripeness by researching the standard timing for your cultivar. But crop load, weather, and fertilizing practices can impact ripening, so you can’t always count on a specific date.
That’s why I like to make notes about the weather throughout the year, the crop load, and the ripening date in my gardening journal.
You might want to harvest your fruits just a bit before they’re fully ripe if you plan to store them.
Learn more about when and how to harvest apples in our comprehensive guide.
Preserving
Prior to the proliferation of fruit shipping from around the globe, apples provided us with fresh fruit through the long winter months.
Few other fruits could survive winter in storage, so if you wanted something fresh and fruity, they were one of your only options.
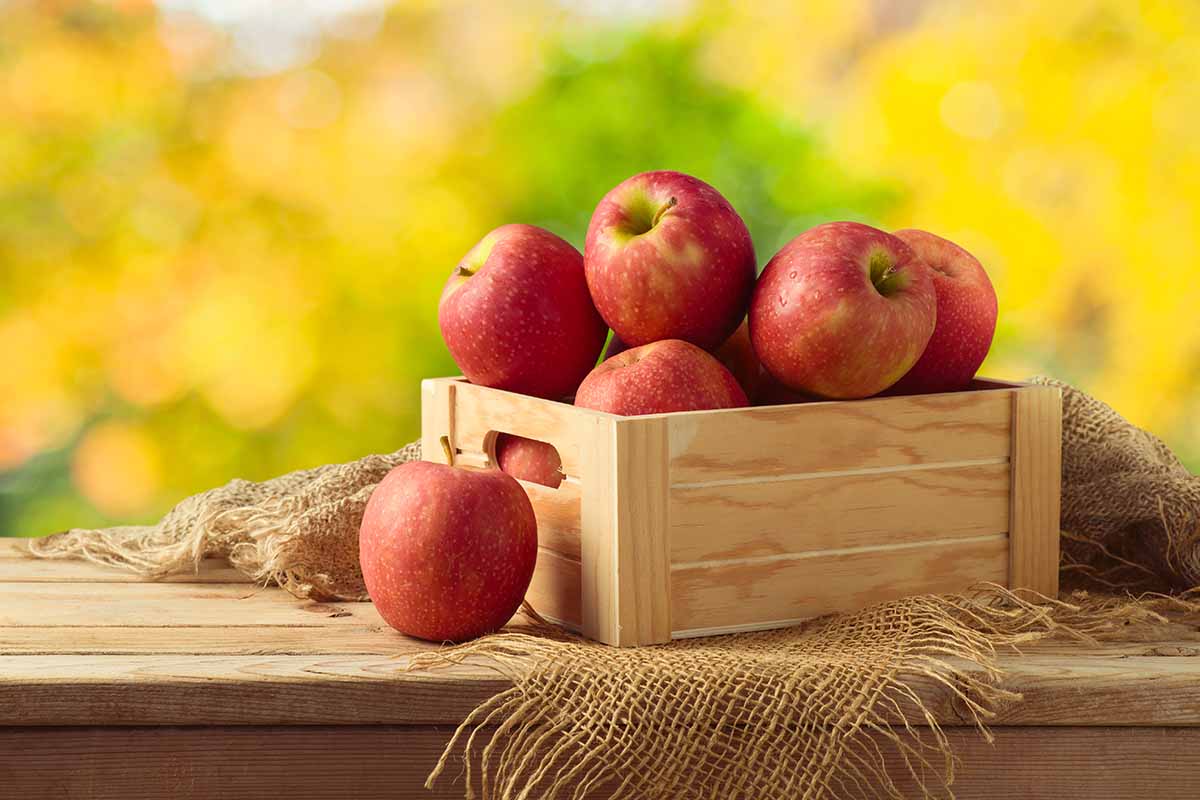
Now that we have fresh fruits from around the globe year-round in our grocery stores, you’d think they would be replaced by tropical fare, but apples are still a fall and winter staple.
I can’t even imagine winter holiday feasts without using apples in several recipes.
Some apples will store for months in a cool, dark area with good air circulation. You can research the storage capability of your particular cultivar, but generally, those with more natural wax will last longer.
You can also preserve your apples by making apple sauce or butter, freezing, dehydrating, or canning.
We have a guide that will walk you through all your apple storage options.
Recipes and Cooking Ideas
I don’t even know where to begin with all the options we have to use up our homegrown apples. It’s a good thing, because the trees tend to produce a large harvest!
Let’s start with drinks. Of course, cider is always an option, but you can also make infusions, syrups, and shrubs to use in cocktails. Our sister site, Foodal has all the details.
There are endless desserts to try, from scones and dumplings to cupcakes and pies. Learn how to make the perfect strudel on Foodal.
But it’s the savory recipes that made me an apple convert. Apples and chicken get along nicely, and I always have a slaw marinating in my fridge.
Try mixing them with cheese, whether you dip slices in fondue or bake them with brie. Toss them in salads, stuffings, and stews.

I have a slaw recipe for every day of the year pretty much, but here’s my basic:
Shred two large or three medium apples, seeds and stems removed. Shred three medium carrots and one head of cabbage.
Shred half a sweet onion or finely chop up three green onions, removing the root end.
It helps to use a food processor with a shredder attachment to make the process quicker, but you can also use a mandolin, if you prefer.
Combine one cup of unsweetened Greek yogurt and one cup of mayonnaise. Add one tablespoon of apple cider vinegar and one tablespoon of lemon juice and mix well.
Add to the slaw mix slowly until you reach the consistency you desire. You might have a little mayo mix leftover. I don’t, because I like my slaw moist. Add salt and pepper to taste.
You can always get creative and add nuts, dried fruit, celery, hot peppers (I prefer habaneros), and even tofu, bacon, or chicken to make it a meal in itself.
Quick Reference Growing Guide
| Plant Type: | Deciduous fruit tree | Flower/Foliage Color: | White, pink/green |
| Native to: | Central Asia | Maintenance: | Moderate |
| Hardiness (USDA Zones): | 3-10 | Tolerance: | Some drought, freezing temperatures |
| Bloom Time/Season: | Spring (flowers), fall (fruit) | Soil Type: | Loose, loamy |
| Exposure: | Full sun | Soil pH: | 5.8-6.5 |
| Time to Maturity: | 6 years | Soil Drainage: | Well-draining |
| Spacing: | 5-10 feet, depending on cultivar | Companion Planting: | Bleeding hearts, crocus, daffodils, flowering quince, forsythia, Japanese camellias, pansies, tulips, wood poppies |
| Planting Depth: | Graft joint one inch above soil surface | Avoid Planting With: | Aggressive vines like English ivy and wisteria |
| Height: | 6-30 feet, depending on cultivar | Uses: | Espalier, edible fruits, ornamental orchards |
| Spread: | 2-25 feet, depending on cultivar | Order: | Rosales |
| Growth Rate: | Moderate | Family: | Rosaceae |
| Water Needs: | Moderate | Genus: | Malus |
| Common Pests and Disease: | Aphids, apple maggots, blister mites, borers, codling moths, fruitworms, leafhoppers, scale, spider mites, tent caterpillars, and thrips; Armillaria, black rot and frogeye leaf spot, bot rot, crown gall, gummosis, powdery mildew, sooty blotch and flyspeck, southern blight | Species: | x domestica |
The Apple of My Eye
If you’d asked me 20 years ago what I thought about apple trees, I would have rolled my eyes and said “too much work for little reward.”
I mean, apple trees are notorious for having problems and you can buy a bushel of fruits cheap at the store, so why bother?
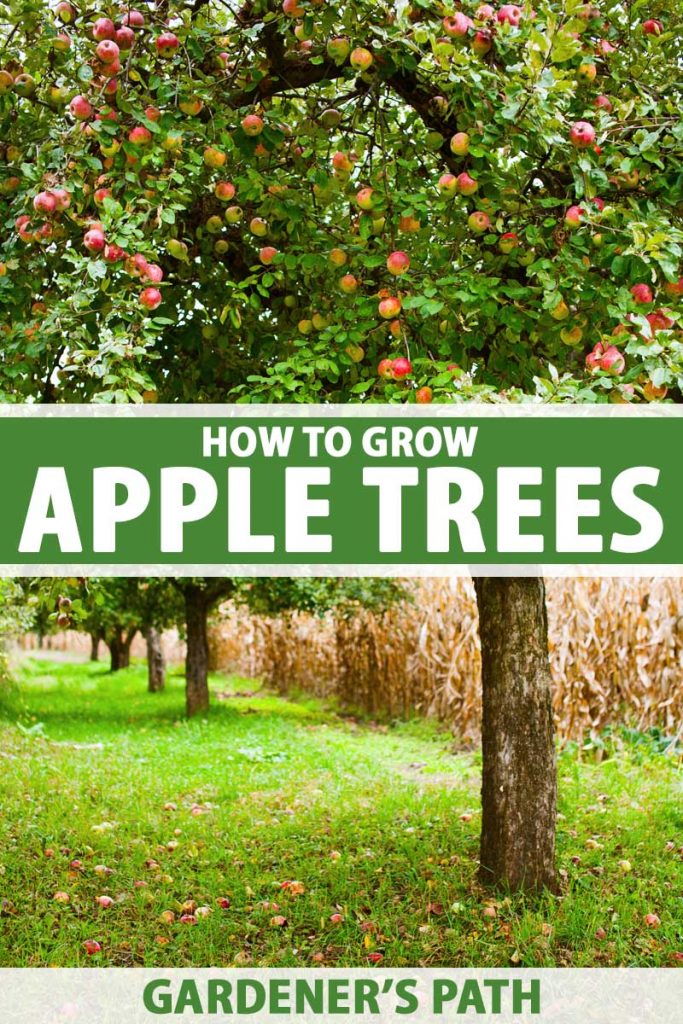
I’m eating my words – and my apples – now. The trees are beautiful enough to be grown purely as ornamentals. The flowers in the spring are worth it alone.
But then, after the flowers drop, the trees have that classic shade tree look that completes any garden. The fruits are a massive bonus at the end of the growing season.
What’s your favorite kind of apple and which one will you be growing? Let us know in the comments section below.
And for more information about growing apple trees, check out these guides next:
I’ve had a Red Delicious apple tree for about 6-7 years. It has produced hundreds of apples, BUT it has yet to produce one apple that turned red??? If I don’t pick them, or the birds don’t eat them, they will naturally fall off, GREEN. I cannot figure out how to make them turn red. Thinking about chopping the tree down and starting over. Please advise.
If you’ve gotten this far (and you’re a ‘Red Delicious’ fan) please don’t chop that tree down! Where are you located, Michael? About how many hours of sun per day does your apple tree get? And is there a pollinator of another variety with the same bloom phase located in the vicinity? It sounds like your tree is suffering from a combination of several potential issues. First, pruning is key. This is usually done in late winter/early spring when trees are still dormant, to remove dead branches and encourage airflow through the growing season, as well as adequate sun exposure.… Read more »
I have a four year old Macintosh tree which was damaged by rabbits chewing heavily on the trunk. The tree has produced apples over the past three years but because of the damage to the trunk this past year it has less foliage but lots of fruit. As a result of the damage there are new beaches growing from the bottom of the tree. I am wondering if the new growth is taking nutrients from the tree? If so what should I do? Thanks Wallace
I’m so sorry to hear about the rabbit damage, Wallace! It’s unfortunate, but severely damaged young fruit trees will not always recover. Suckering is common in grafted trees, and these suckers are likely coming from the rootstock rather than the Macintosh scion. Putting energy into producing this new growth will sap your tree’s energy, and these should be removed as soon as possible if they’re coming from below the graft union.
In early spring, remove any dead growth from the top of the tree. If new growth does not appear, you’ll have to remove and replace it.
I have a place at Odisha Ganjam, where I want to start apple production. Kindly help me – is this place suitable or not?
Odisha has a hot and humid climate, which can make apple growing difficult, but not impossible. You may be interested in this article that references a farmer who successfully grew ‘Himachal’ type apples there. Look for varieties that require a low number of chill hours to produce fruit, like ‘Gala’ or ‘Tropical Beauty.’ With attentive care, you should be able to bring in a harvest in your region. Good luck!