It's probably hard to think of a situation more frustrating than having your laptop or PC stop working altogether for reasons unknown. It's thankfully not that common, but any time it occurs is one time too many, and if you cna't even boot your computer, you might think you're out of luck. Thankfully, that's not the case, and you can always get back to a working state.
There are plenty of things you can try if your PC isn't booting, so let's start from the basics and go up from there. First off, try booting your PC without USB devices plugged in and see if that might be the problem. If that doesn't help, try the fixes below.
Use Startup Repair
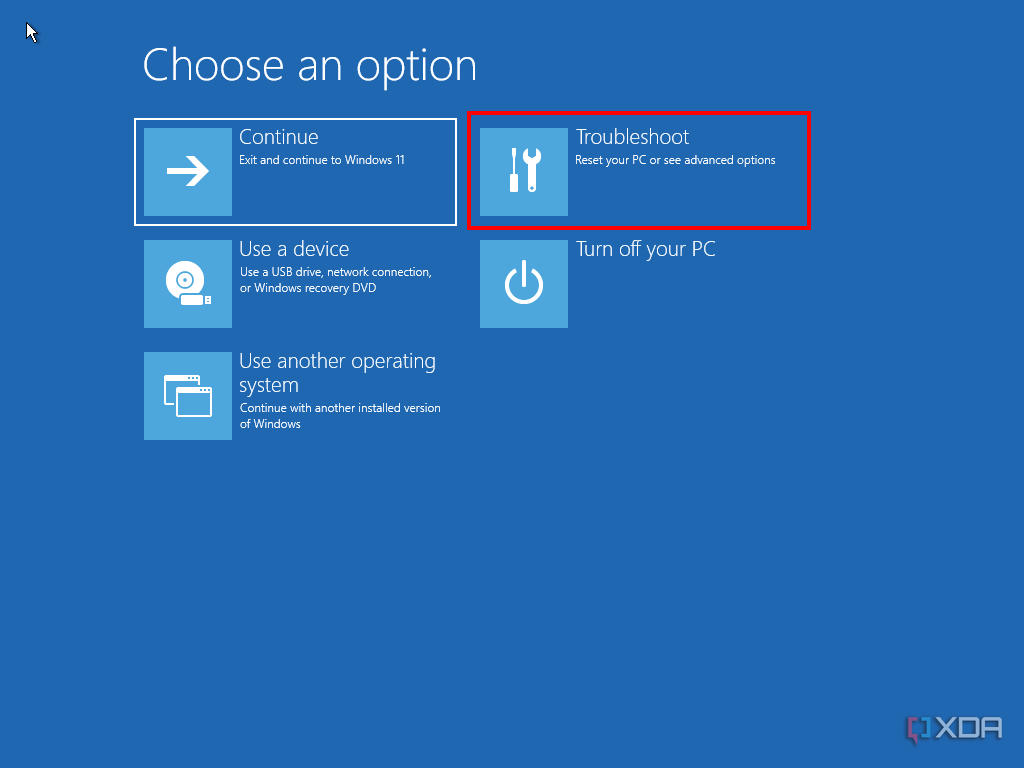
When your computer fails to boot twice in a row, Windows will take you to Automatic Repair, which can help you address issues with your PC not booting. There are a few things we can try here, but the easiest and first method to try is Startup Repair. Here's how it works:
1. Try to boot your PC three times in order to get it to load Automatic Repair.
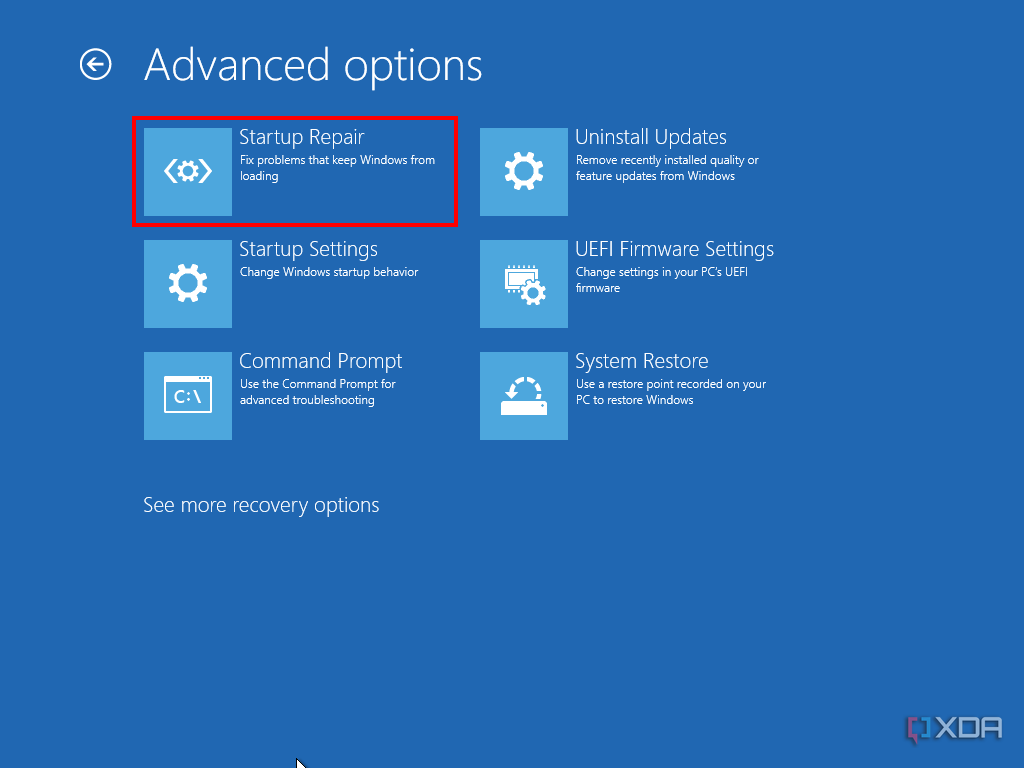
2. Click Advanced options, then choose Troubleshoot and then Advanced options.
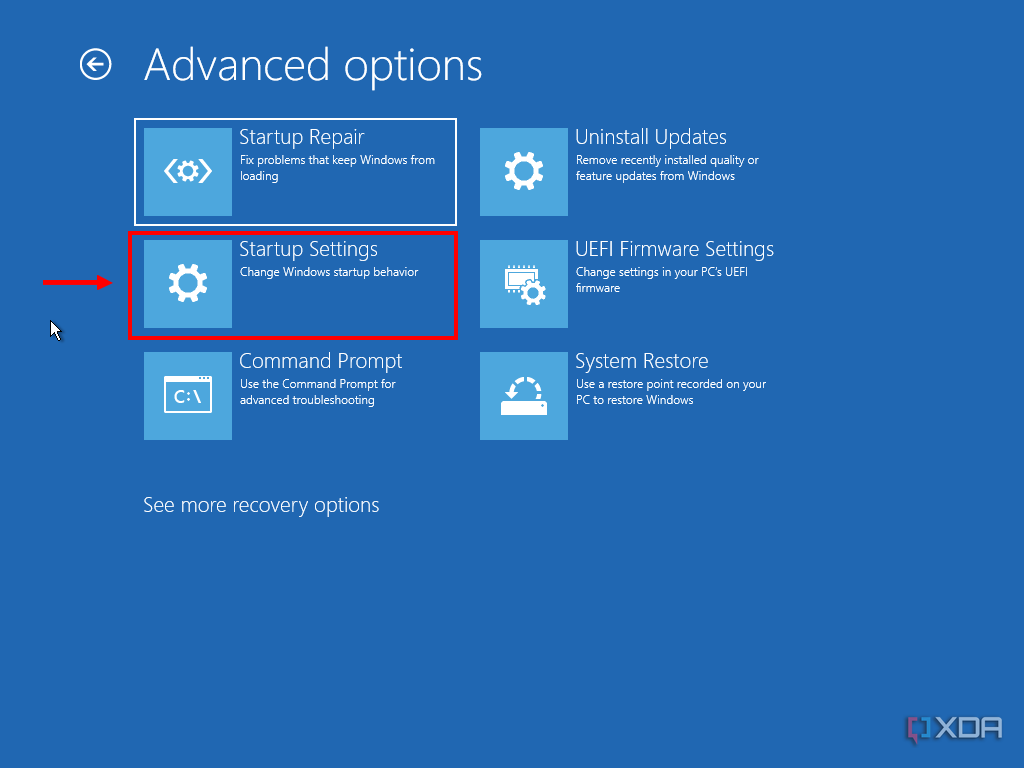
3. Here, click Startup Repair.
Windows will attempt to diagnose and fix any problems that may be stopping your PC from booting properly. If you see a successful message, reboot your computer and try again.
Uninstall updates
If you believe the issues you're having were caused by an update you installed recently, you can try uninstalling it. For this, try these steps:
1. Once you've reached the Automatic Repair screen, click Advanced options > Troubleshoot > Advanced options.
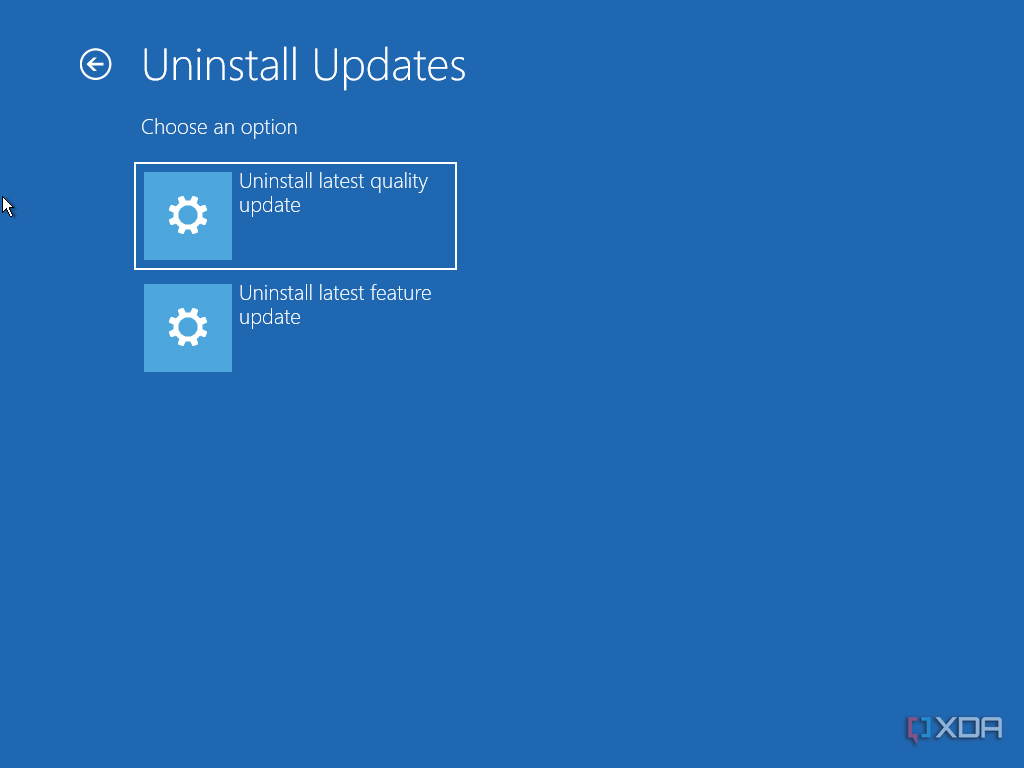
2. Here, click Uninstall updates.
3. Click Uninstall latest quality update if it was a general cumulative update that caused the issue. You can also try Uninstall latest feature update if you installed a big update like Windows 11 version 24H2.
If the issues were caused by these updates, they should be mitigated by this method. You may need to temporarily pause updates in order to prevent the issue from happening again, or update your device drivers to make sure there isn't some kind of compatibility issue.
Enter Safe Mode to uninstall drivers
Sometimes, boot problems in Windows 11 can be caused by faulty or incompatible drivers. A good way to test this is to enter Safe Mode, which loads Windows with only the minimum required drivers. If Windows boots into Safe Mode, it's likely that drivers are the issue, so you already know where to start. To boot into Safe Mode, follow these steps:
1. Once you get to Automatic Repair, click Advanced options > Troubleshoot > Advanced options.
2. Click Startup settings and then Restart.
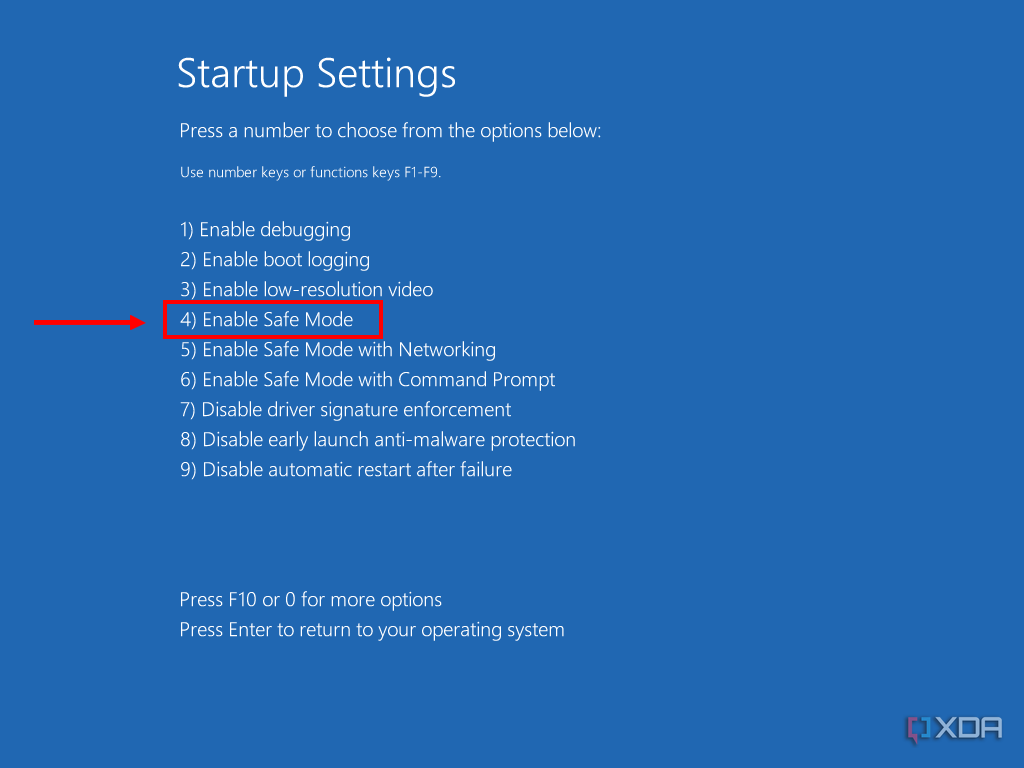
3. Once the computer restarts, press 4 on your keyboard to boot into Safe Mode.
From there, try to look for any devices that were recently updated or that you plugged in for the first time. If you already know what driver could be causing the problem, uninstall it using either Device Manager or, in the case of graphics drivers, Display Driver Uninstaller (if you have it already). Then, reboot your computer and try to install a newer driver that (hopefully) won't have the same issue.

How to boot Windows 11 into Safe Mode
Is your Windows 11 PC unstable? Here's how to boot into Safe Mode in Windows 11 so you can troubleshoot any issues you might have.System Restore
Another option in the Windows Recovery Environment is using System Restore, though keep in mind this requires you to have set up a system restore point while the computer was functional. For this:
1. Once in Automatic Repair, click Advanced options > Troubleshoot > Advanced options.
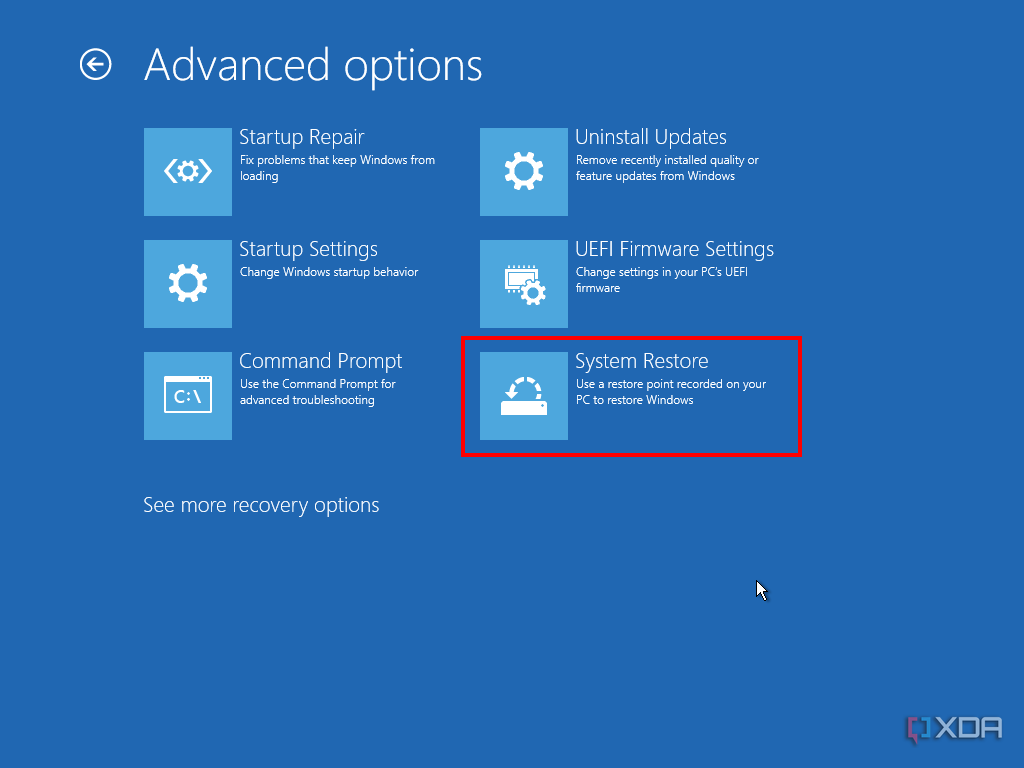
2. Click System Restore.
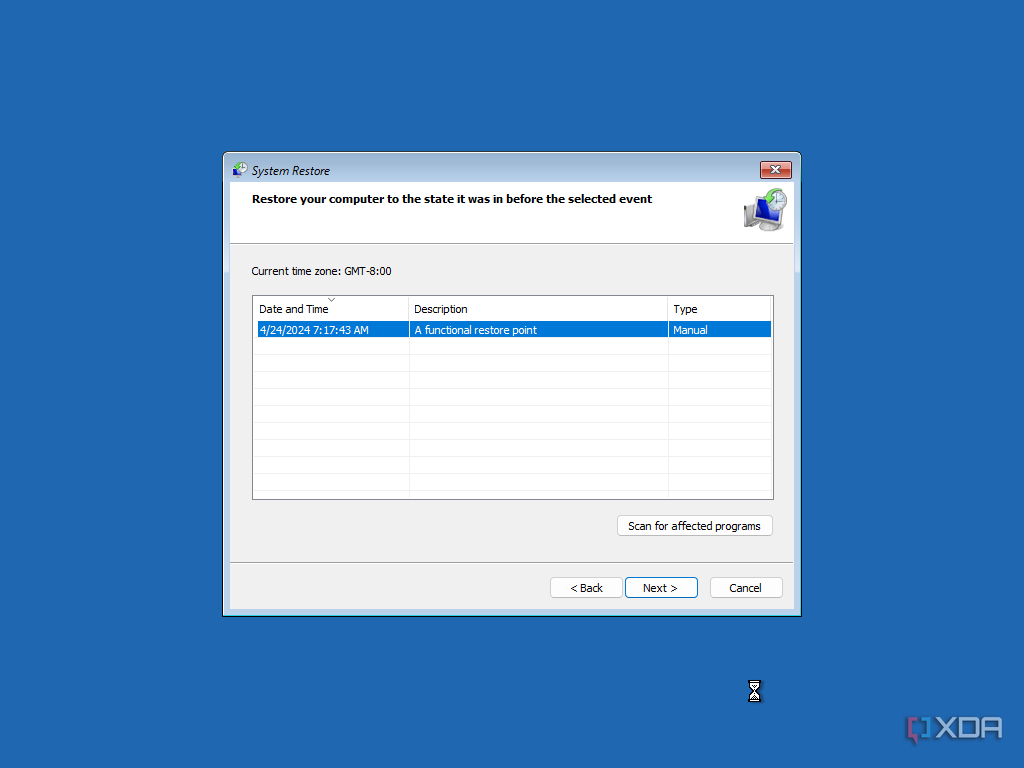
3. Click Next.
4. If any system restore points exist, select the latest one from a date where you know the computer was working as normal.
5. Click Next and then Finish to begin restoring your PC.
This should bring your computer back to a functional state, and you can avoid whatever may have caused it to stop booting.
Assign a drive letter
If you installed a new drive, there's a small chance that the boot drive for your Windows PC no longer as a drive letter assigned, which can stop it from booting. To fix this, you'll need to re-assign the drive letter to the drive, whichis relatively easy to do.
1. From Advanced Repair, click Advanced options > Troubleshoot > Advanced options.
2. Select Command Prompt.
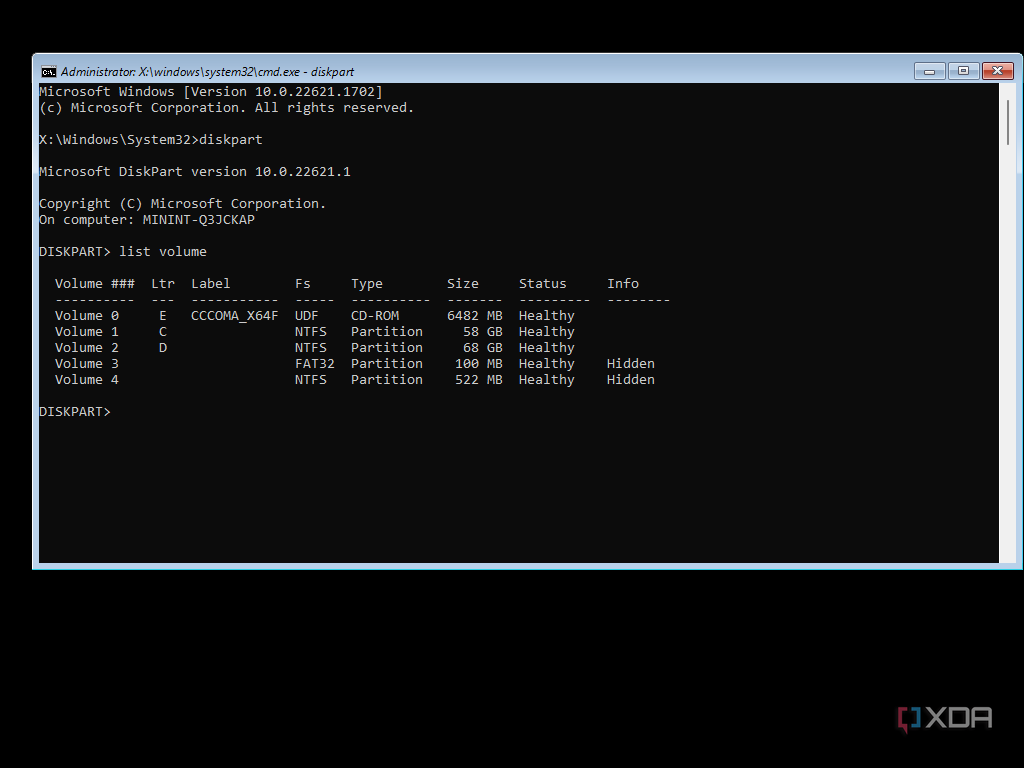
3. Once the computer restarts and show the Command Prompt Window, enter this command:
diskpart
4. Then, enter the following command to see the drives on your PC:
list volume
If you see a drive without a letter, you may need to assign one. Ignore drives that are only under 1GB in size, as there are system drives that shouldn't be touched.
5. To assign a letter, you'll first have to select the volume you want to take action on, such as volume 0. Use this command with the appropriate number
select volume 0
6. Assign a drive letter with this command:
assign letter=F
You can assign any letter that isn't already assigned, aside from A and B.
Once this is done, close Command Prompt and restart your computer, and it should be good to go.
Check for malware
Another option, albeit an unlikely one, is that you have some kind of malware preventing your computer from booting. If this is the case, you can use a rescue disk from an antivirus manufacturer to try and get your PC running again.
While many rescue disks may require you to pay, Kaspersky offers a free rescue disk download, which you can flash onto a USB drive using a program like Rufus.
Boot from the USB drive by using Automatic Repair and going to Advanced options > Troubleshoot > Advanced options, and then choosing Use a device. Follow the instructions to scan your device for malware and the problem should be solved.
Reset your PC
If what we've tried so far hasn't helped, you may just need to restore Windows to its factory settings. You can reset your PC easily from within Automatic Repair:
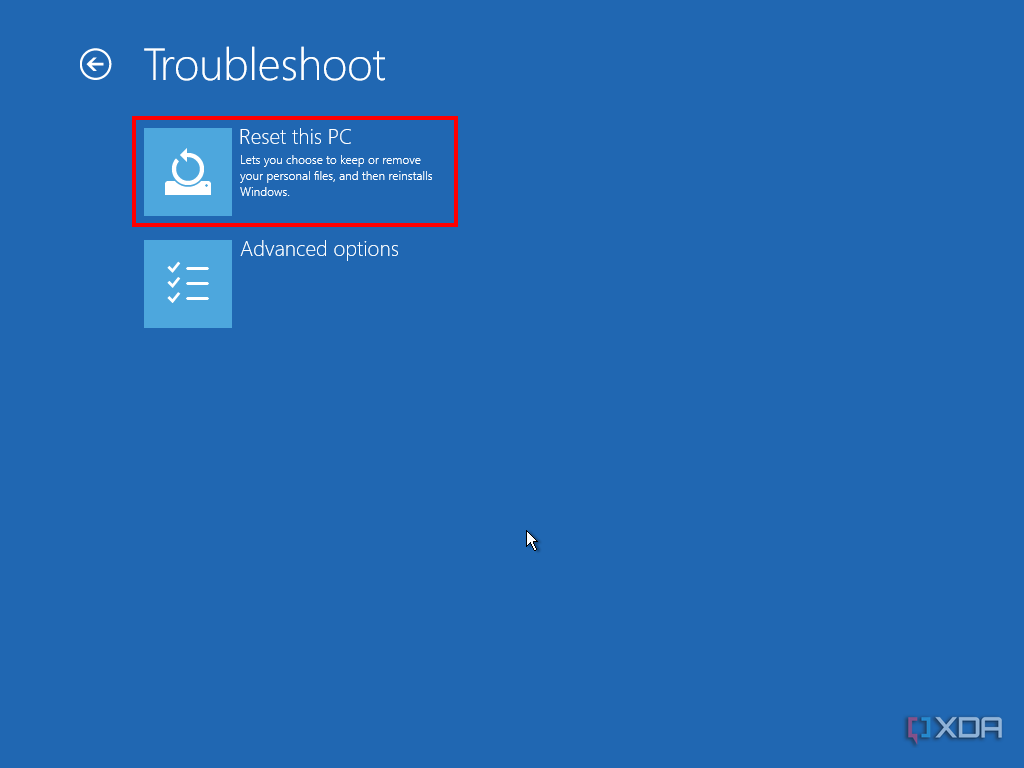
1. After your computer fails to boot and you get to AUtomatic Repair, click Advanced options > Troubleshoot.
2. Click Reset This PC.
3. Choose Keep my files if you don't want to lose the files currently on your PC. If you want to delete everything, choose Remove everything.
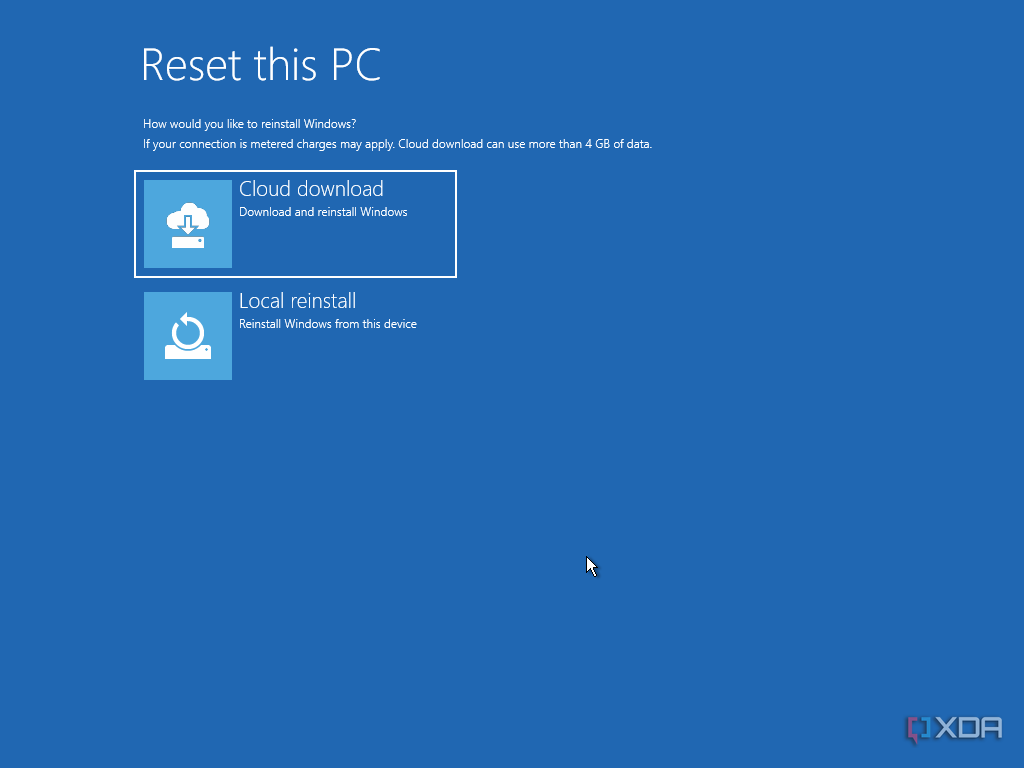
4. Choose Local reinstall for a faster process. If you have an internet connection and want to ensure you have a clean image, you can use the Cloud download option.
5. Click Reset and follow the process to set up your PC.
This is a more extreme solution, but it should be one of the most effective solutions.
Use a USB drive to reinstall Windows
If none of the solutions above work for you, your final option is to reinstall Windows. You can do this by creating a USB installation drive using another PC. You can use the Media Creation Tool for Windows 11 to format a USB drive you have to use as installation media. Simply head to Microsoft's website and click the Download now button under Create Windows 11 Installation Media and follow the instrucitons. It's a lengthy but fairly straightforward process.

How to download and install Windows 11
Curious to check out Microsoft's new operating system? Here's how you can download Windows 11 right now to try it for yourself.In order to boot from the USB drive, you have two options. The first option is using Automatic Repair as mentioned above. After going to Advanced Options > Troubleshoot > Advanced options, choose Use a device and select the USB drive you're using as installation media.
The second option, if you can't get into Automatic Repair, is to get into your computer's BIOS to choose a boot device. Getting into the BIOS depends on what machine you have, but typically, you can try pressing Esc, F2, F11, or F12 keys as soon as you turn on the computer. From there, just choose the USB drive you want to boot from, and follow the usual steps to install Windows 11 from scratch.
Get things back up and running
With all of these steps, you're bound to find a solution to ensure your PC is usable again. Of course, we're ruling out physical hardware problems, at which point you need to explore other options. But if the problem has to do with software, these solutions should be all you need to get your PC up and running.

