Imagine a digital mailbox nestled in the vast landscape of the internet, where your emails are securely stored and organized with the precision of a master archivist. That is Yandex Mail! Yandex Mail is an email service provided by Yandex, a Russian multinational corporation known for its internet-related products/services. It offers users a platform to send and receive emails, manage contacts, and efficiently organize communication. But, after a time, there is a need to backup Yandex Mail. In this blog, we will learn why and how to export Yandex Emails to PST.
Instant Solution: Easily Backup/Export your email data from the Yandex Mail Server to the Local computer system in Outlook PST format. Download Shoviv IMAP Backup and Restore tool and start your Yandex email backup today.
What Are the Benefits of Yandex Mail Backup?
- Making backups means keeping extra copies of your essential stuff in a safe place. This way, if something goes wrong and you lose data, you will still have it backed up and won’t lose it forever.
- During the backup process, excluding attached files from email messages is possible.
- Enable users to save their Yandex mail data in various file formats and store it on various cloud platforms or webmail services.
- Keep your data safe from both malware attacks and accidental human errors.
- If you backup Yandex Mail to PST, then you will able to add PST to any Outlook account and access the emails.
- You can simply save the Yandex email to a Hard Drive and keep it safe as per the requirement. Also, it is easier to port and share.
Export Yandex Emails to PST:
Several users have been using Yandex email platforms for many years. But now they want to export all their mailboxes from Yandex mail to PST format, mostly for Outlook. It seems users are finding Outlook more suitable and a secure mailing environment for their requirements. After importing the backups into PST format, users can import them into any Outlook version, such as Outlook 2019, 2016, 2013, 2010, 2007, and other editions.
In this guide, I’ll reveal the top two methods to backup Yandex Mail into a PST file. Stick around until the very end to uncover all the details.
Yandex Mail lacks the feature to export emails to an Outlook .pst file, as this format is exclusive to MS Outlook and isn’t supported by Yandex. If you are thinking about how to do this, then go with this method.
Manual Method:
- Install MS Outlook in your system.
- Let’s get Microsoft Outlook up and running on your device. Now, add a Yandex account to Outlook, and for this, Select File> Info> Using the (+) Add Account option, add the Yandex account to Outlook.
- Go to the “File” tab, select “Import/Export” from the menu, and finally click on “Open/Export.”
- Go for the “Export to a file” and select the Outlook Data File (PST) option and proceed by pressing “Next.”
- Choose your mailbox folders and then proceed by clicking continue.
- Pick where you want it to go, and then hit Finish.
All MS Outlook settings are set to generate a PST file from your Yandex Mail account.
Disadvantages-
There are a couple of disadvantages to this approach, and a few of them are listed below:
- It is a very time-consuming task; it may take you days.
- Outlook lacks the feature to filter emails according to required criteria.
- MS Outlook needs to be installed.
Professional Method:
If you want to export your Yandex Email to PST or save it to a hard drive in any other file format, the Shoviv IMAP Backup and Restore Tool is the perfect solution.
Features-
- It’s versatile enough to sync with various email clients, such as Yandex, SquirreMail, Gmail, Yahoo! Mail, and other IMAP-compatible services.
- Users can back up their Yandex Mail data in well-known file formats like PST, MBOX, MSG, and EML.
- With its user-friendly layout, even those new to the tool can efficiently execute backup and restore tasks in no time.
- Along with backup, users can also restore (import) files to mailboxes. Users can restore data from OST, PST, MBOX, MSG, and EML/EMLX
- With this Shoviv IMAP Backup Tool, you can choose which emails to save by setting filters for dates and folders.
- This utility runs on job-based processing, and you can create multiple jobs, and in each job, you can add multiple mailboxes. By creating multiple jobs, you can reduce the time to back up Yandex Mail.
- Shoviv stands out for its exceptional customer support, ensuring users receive prompt and effective assistance whenever they need help navigating the tool or its functionalities.
- It is compatible with all Windows OS. You can run smoothly on Windows 11 Pro and any other version of Windows you might be using.
Easy Steps to Export Yandex Mail with Shoviv IMAP Backup and Restore Tool
Step 1- Install and open the Shoviv Yandex Backup Tool AKA IMAP Backup Tool.

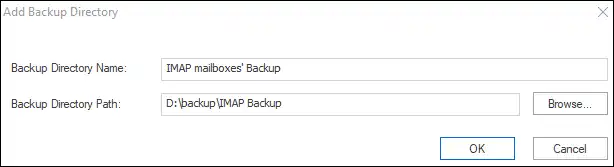
Step 2- Find the “Backup Directory” tab and browse your folders to select the right spot to store your Yandex Mail backup.
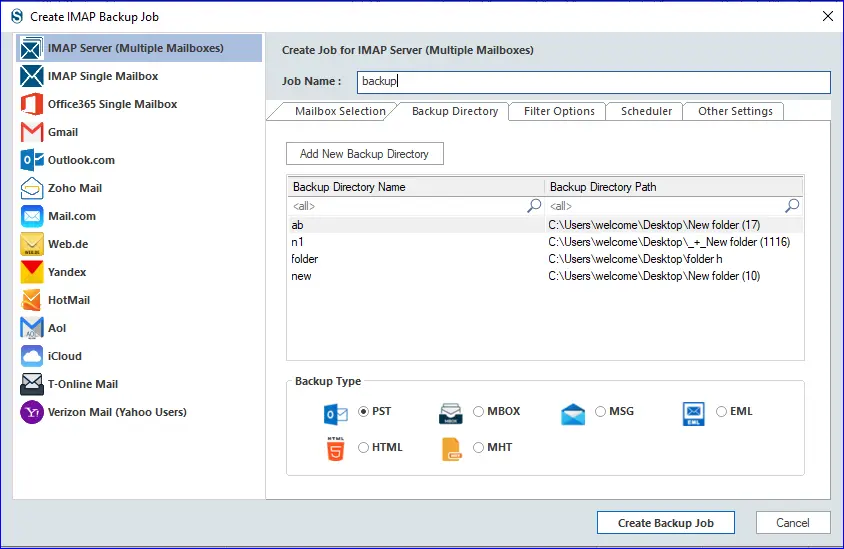
Step 3-Navigate to the Backup Jobs section and adjust the settings to match your needs. Give the job a unique name, and input the server name, port number, and any other details as requested.

Step 4- Remember to mention the backup directory path when you add it to the backup directory. Also, remember to choose the type of backup you want; in this case, we are going with PST files. Feel free to pick whatever suits you.
Step 5- Use the date and folder filters to refine your search within the filtering section if necessary.

Step 6- Using the Scheduler settings, you can schedule the backup job at your convenience, launch it instantly, or handle it manually whenever you prefer.

Step 7- When planning to schedule Yandex Mail Backup, Pay attention to the frequency, duration, and timing of the backups.

Step 8- After configuring details such as thread count and login attempt parameters, as demonstrated in the image, don’t forget to establish the maximum limit for failed login attempts. You can also define the size of the PST file that will be created. When all settings are in place, just click on “Create Backup Job” to initiate the backup process.

Step 9- Once the job-run action begins, the process to backup Yandex Mail will initiate, and you will get to monitor a live report that details the entire process as it happens.
There You Have It:
Dive into this blog for a detailed walkthrough on how to safeguard your Yandex Emails with backup. With the help of the Shoviv IMAP Backup and Restore Tool, users can save their Yandex mailbox messages in various file formats like PST, MSG, EML, MBOX, and more. Users can download this software to see the workings of the free demo version. The demo version allows processing the first fifty items per folder; however, there is no such limitation with the licensed one.
- Ways to Migrate Emails from EarthLink to Office 365 - May 28, 2024
- How to Migrate Emails from Gmail to iCloud? - May 24, 2024
- How to Backup Kerio Email into External Drive? - May 18, 2024