When we use a computer, all the applications that we use by default enter all the cores of our processor in order to function, although there are ways to prevent programs from using all the cores, and that is by changing the affinity. This may seem useless at first, but there are times when we can choose to assign we the cores of the CPU to gain performance in certain applications, such as video games.
Changing the affinity of an application is relatively easy to do, although there are certain cases in which there may be another program that prevents us from doing this, so this may prevent us from doing it in the simplest way. Below we are going to show you the simplest ways you have to be able to assign the cores that you love one applicationwithout installing anything, as well as through a program that allows us to optimize our CPU.
What is the purpose of assigning certain cores to a program?
As we explained at the beginning, when using computer applications, they are programmed to go through all the cores of a computer in such a way that the speed is optimized, making the program have higher performance. But in certain cases this can be a problem, as is the case with the E-Cores offered by Intel, since for applications that require great power such as video games, these have major performance problems if they end up entering one of the the efficiency cores offered by the latest Intel processors.
But this is not the only reason we can have, since in the end when we play around a little we can see that there are affinity masks that can allow an application to work much better, although it is clear that this is just testing, since each situation can to be different. In this way, we are going to show you how you can apply certain changes to be able to completely control the cores through which your applications pass.
Using Windows Task Manager
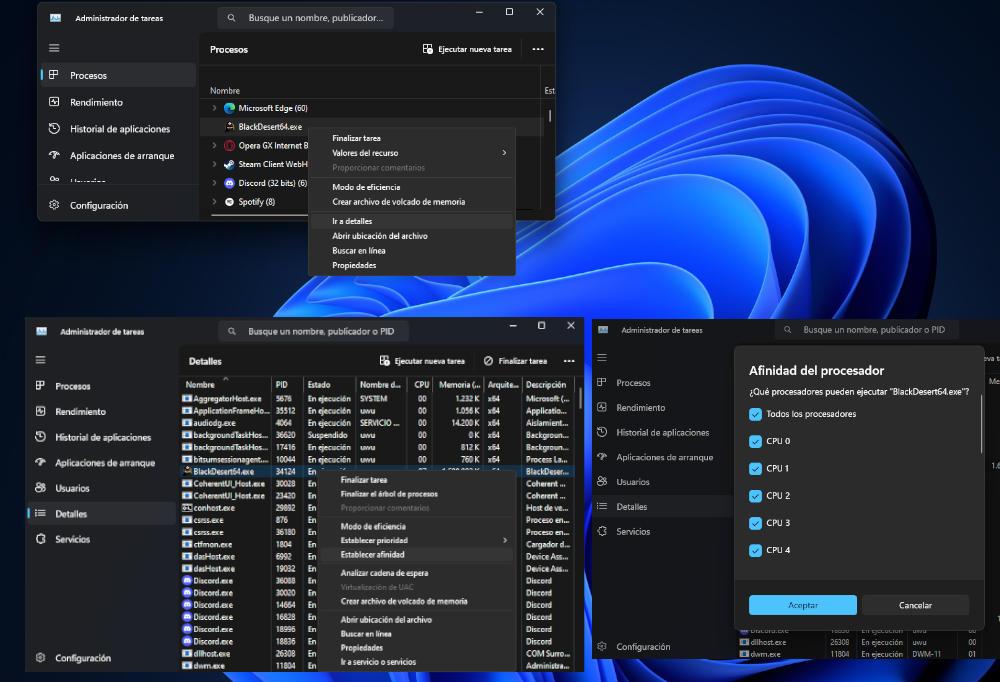
There is a very simple way to apply a custom core assignment in Windows, and it is simply through the task manager, which allows us to change various parameters related to the operation of the programs we are running.
- We open the task manager
- We position ourselves on the “Processes” window
- We right click on the program to which we want to change the assigned cores and click on “Go to details”
- Once in the “Details” tab, we right click on the program executable
- A drop-down menu will open where we will have to select “Set affinity”
- Once here we can select the cores that we want that application to use.
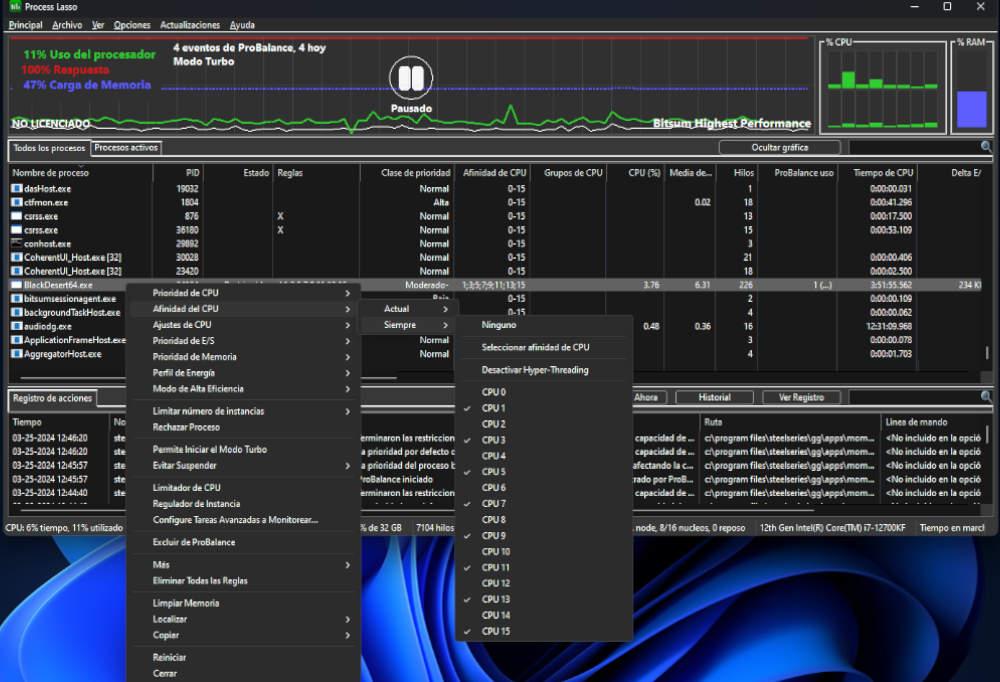
Through Process Lasso
If we want to have greater control over our applications, we can choose to use the Process Lasso program, which offers us an interface capable of modifying our CPU in real time with a large number of parameters that we can modify.
- We download Process Lasso from the official website and install it
- The program will open and show us all the applications in use
- We look for the application we want to modify and right click on it
- A drop-down menu will appear, we mark the option “CPU Affinity”
- Another dropdown will open with two more dropdowns, “Current” and “Always.”
- If we set the parameters from “Current” the program will change the core assignment until the application is closed
- On the contrary, if we choose “Always” it will incorporate the use of the cores that we specify for each time we open the program.
- We select the one we need and another menu will open in which we can assign the cores we want.